Plan
- Deutsch: Diese Seite ist nicht ins Deutsche übersetzt
Once a new project is created, you can edit project details in the Plan module and create project groups to assign and organize assets for inspection. This setup supports efficient planning and timely inspections. The next section explains how to create, edit, delete and add assets to project groups.
Steps to create project group
-
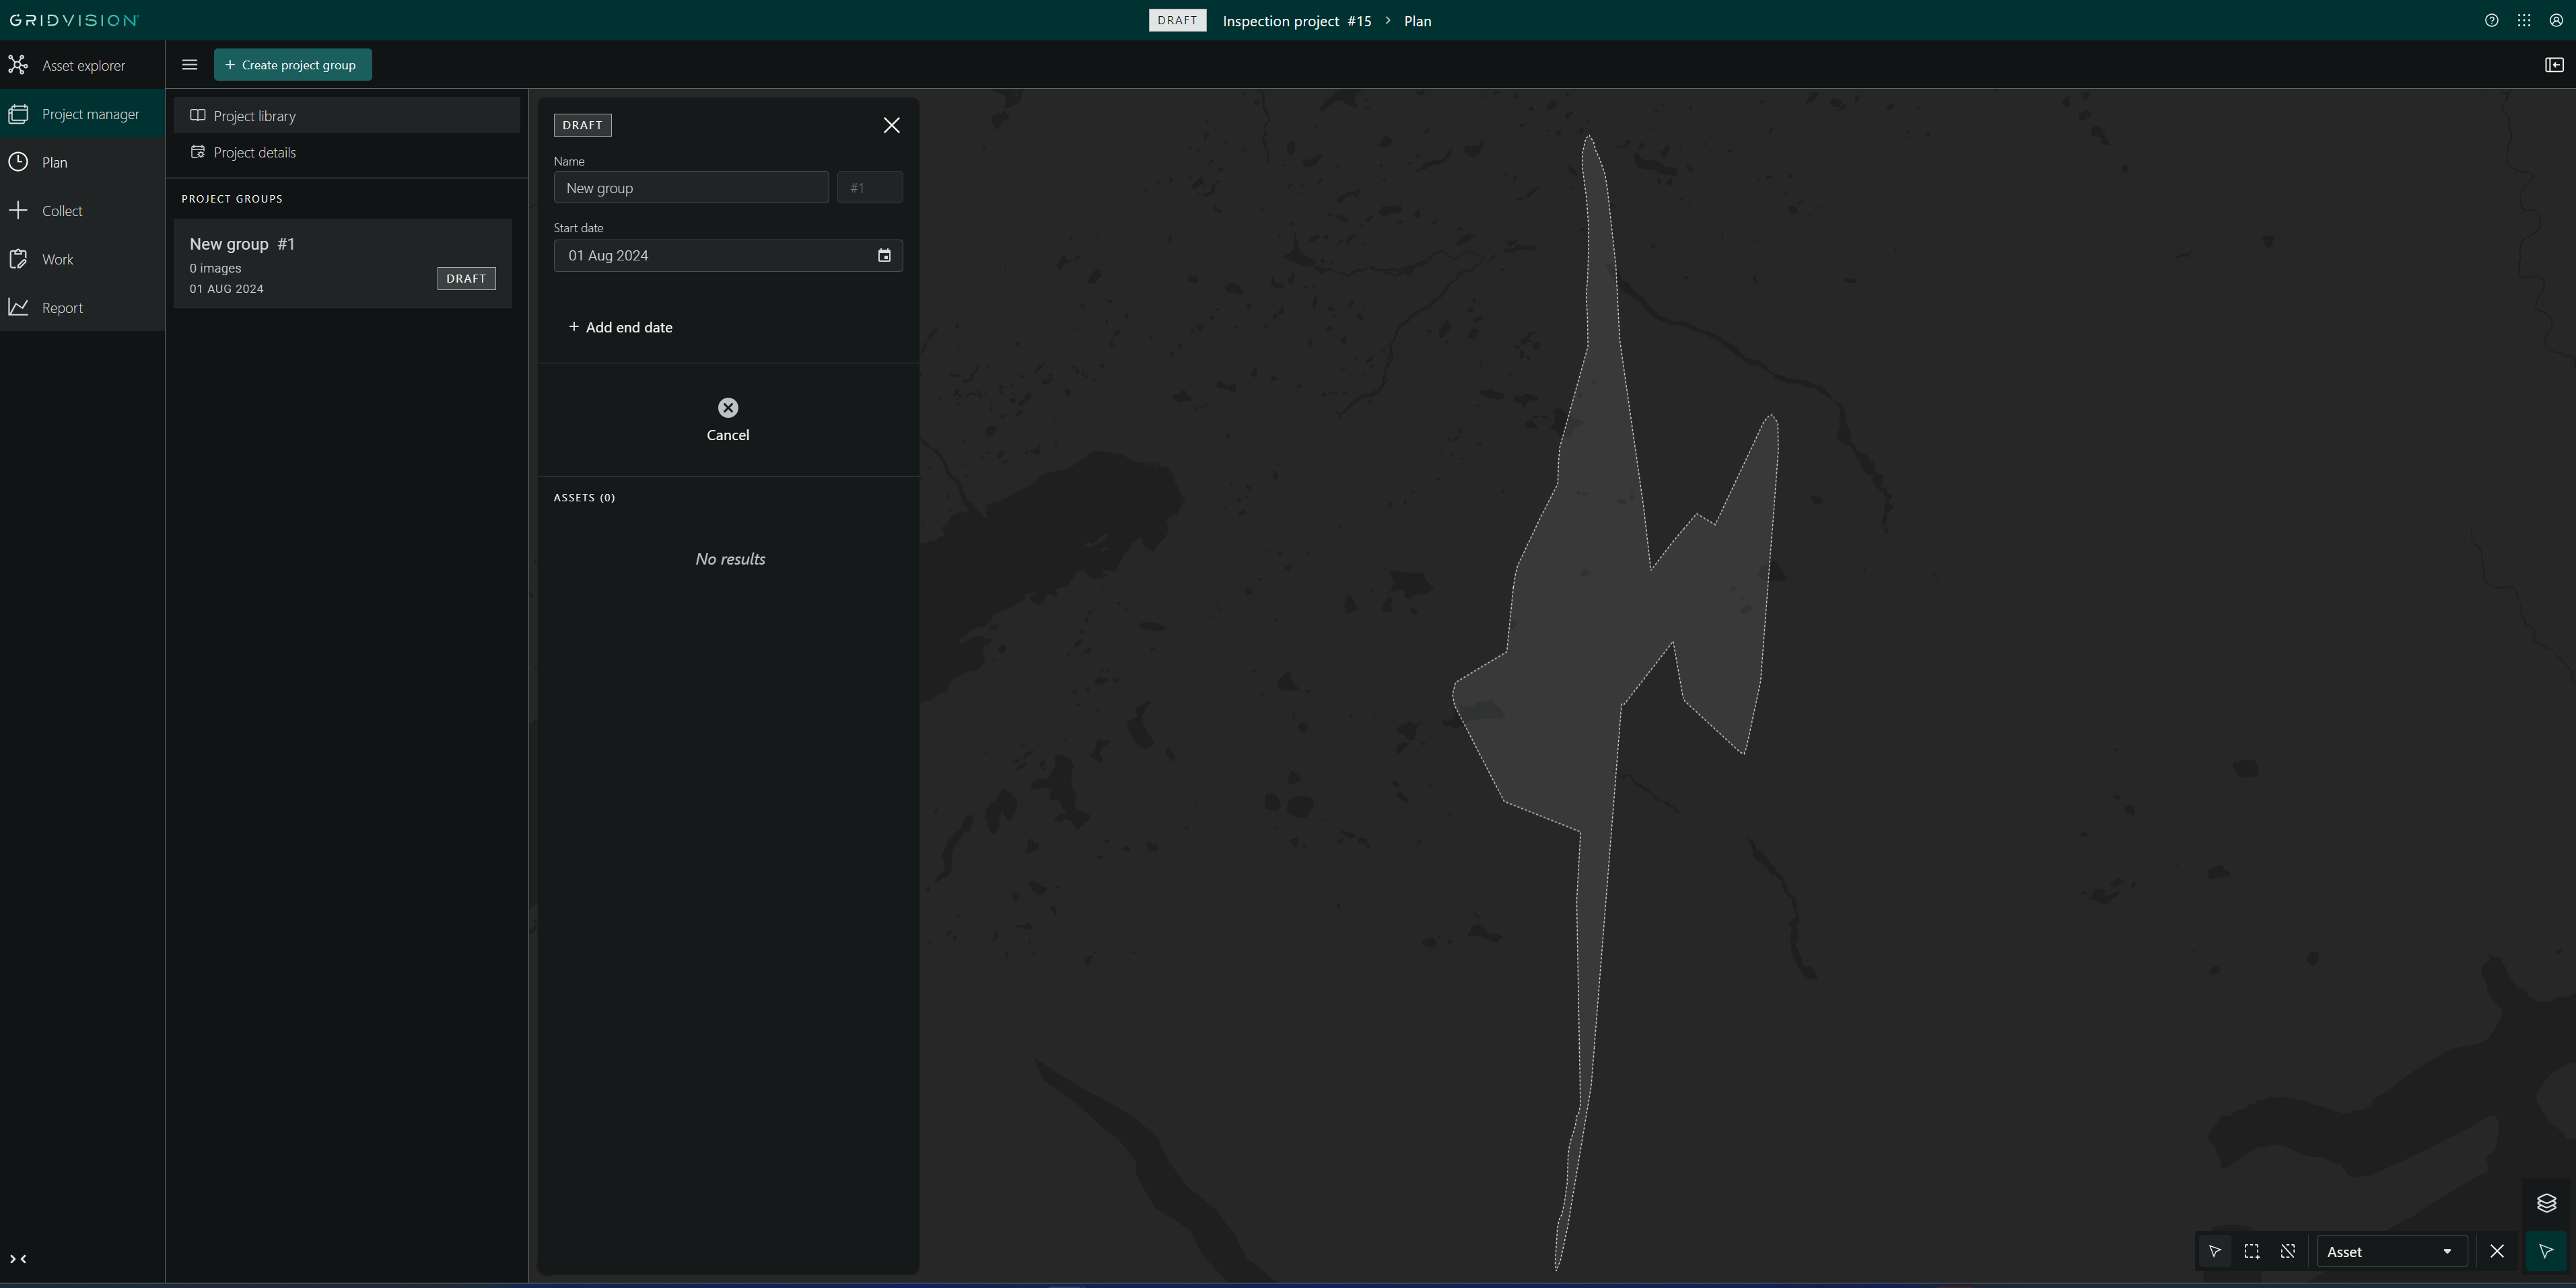
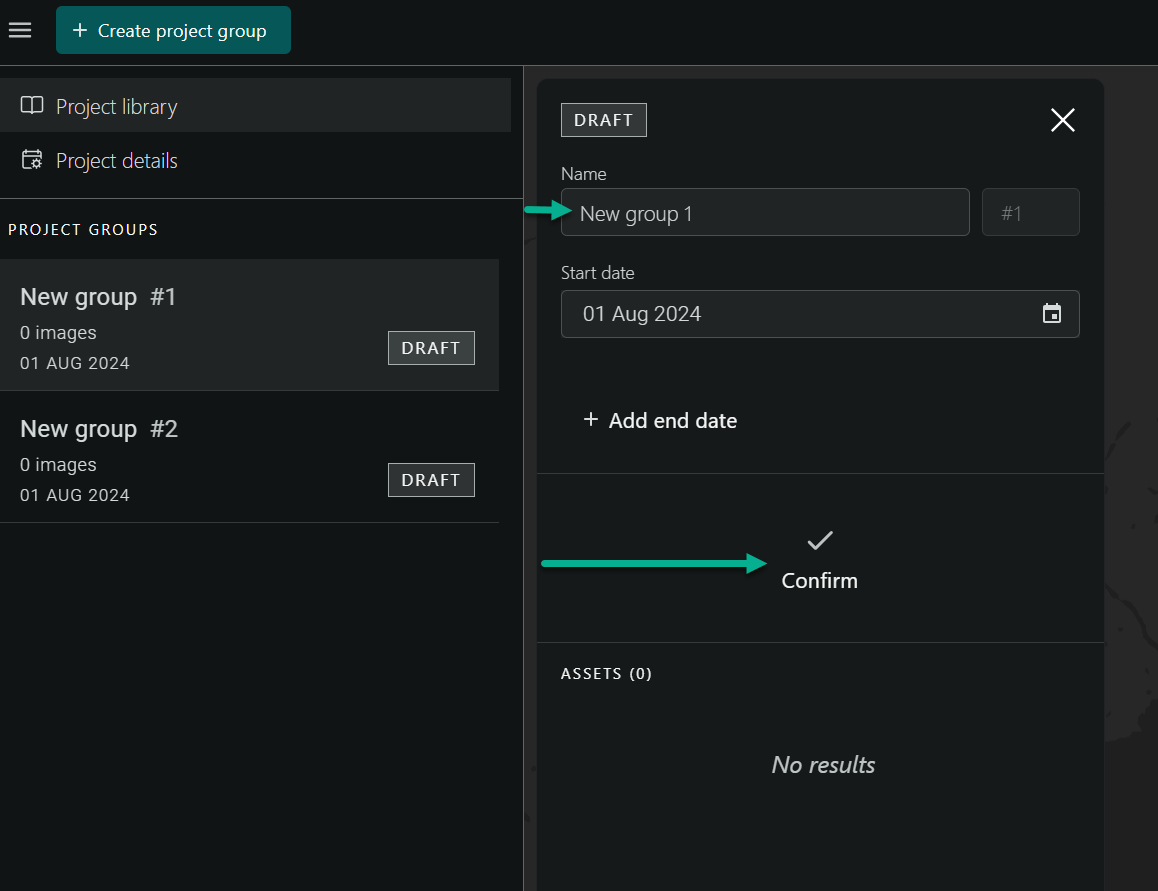
Start by clicking on "Create Project Group" in the module bar.
-
Project group is created and added to the navigation pane in addition to that a compact view is automatically opened displaying:
-
Project group status (Default Draft)
- Project name (Can be edited)
- Project group number (Cannot be edited)
- Start date (inspection start date can be edited)
- Add end date (inspection end date can be added and edited)
-
Cancel button
-
Editing the desire section enables the confirm button.
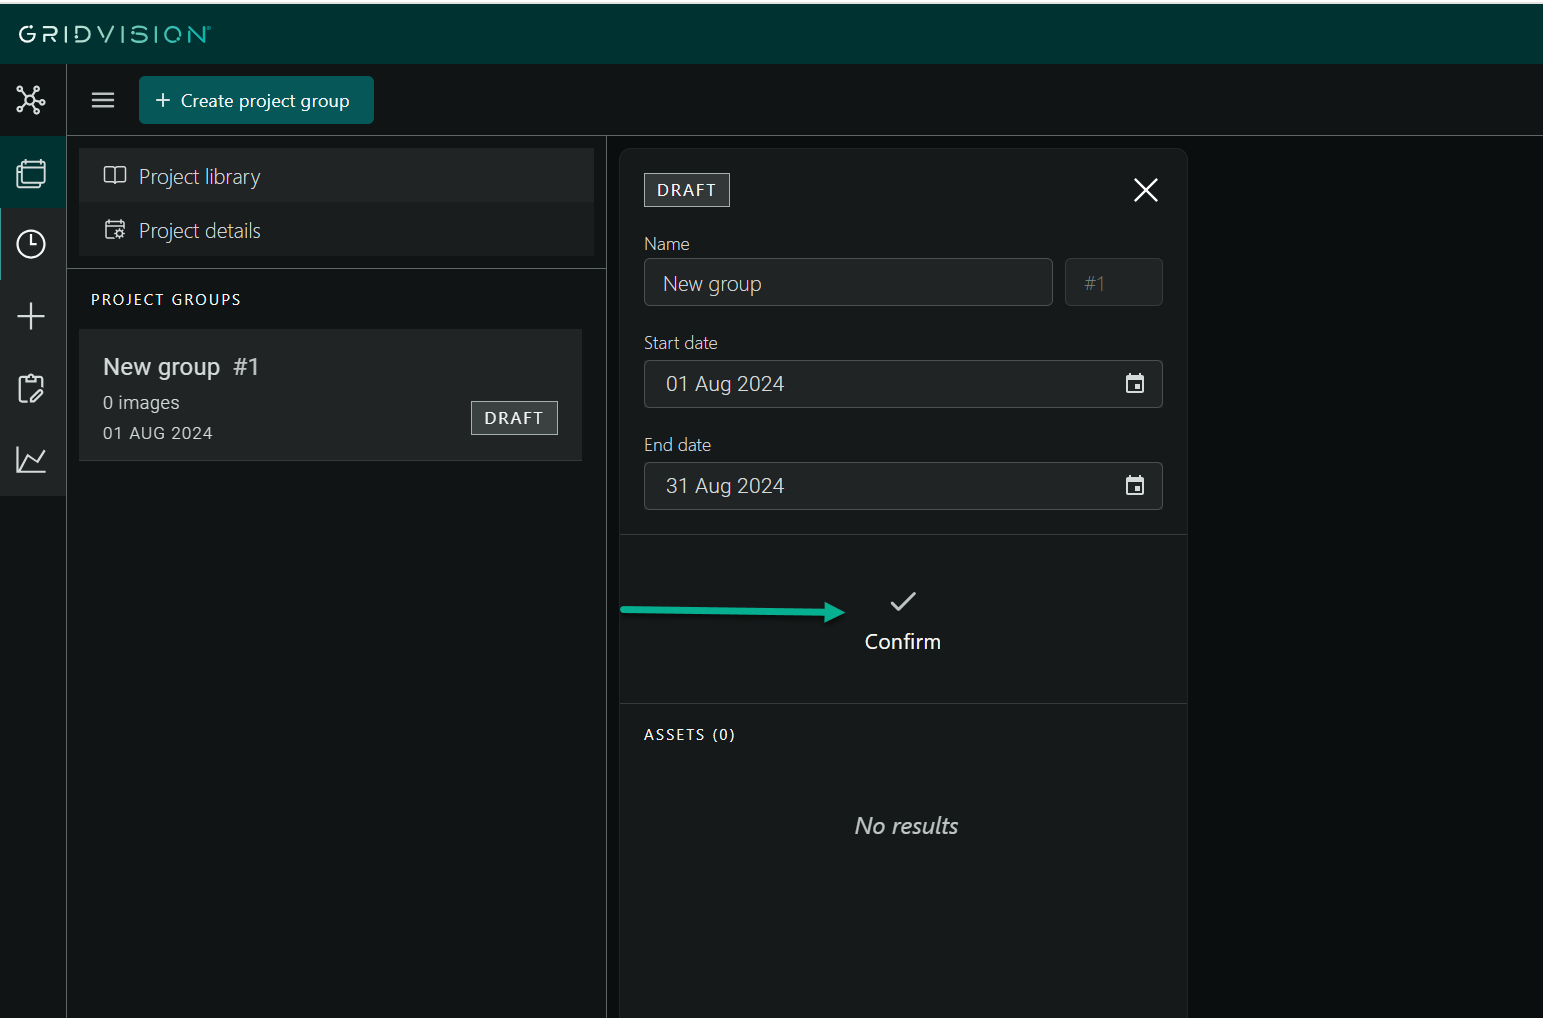
- Click on the confirm button to save the changes.
- Follow above steps to add more than one group under the project.
Steps to edit project group
-
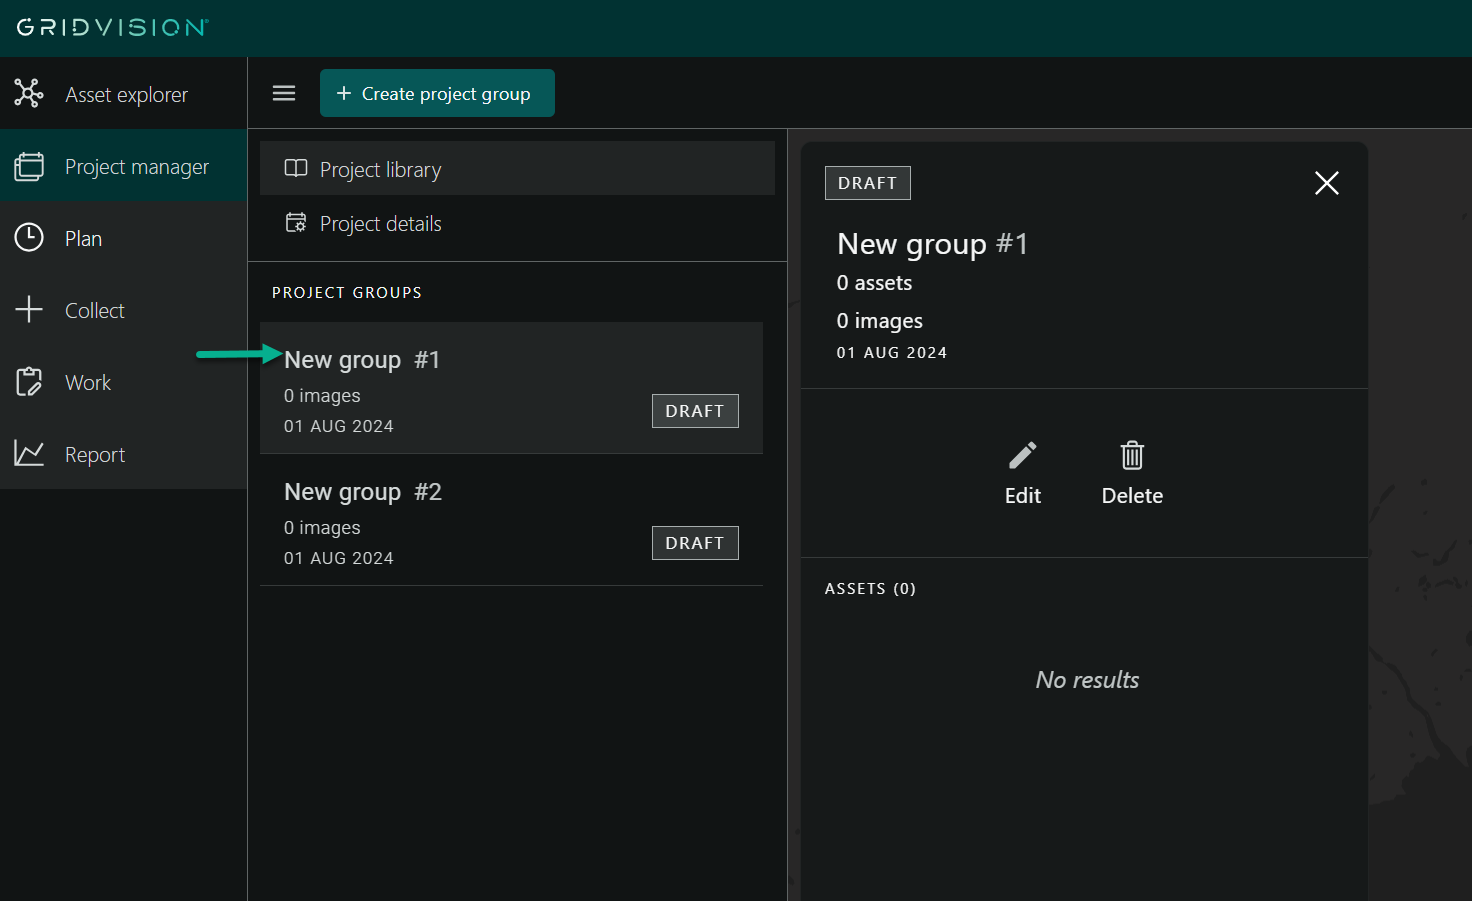
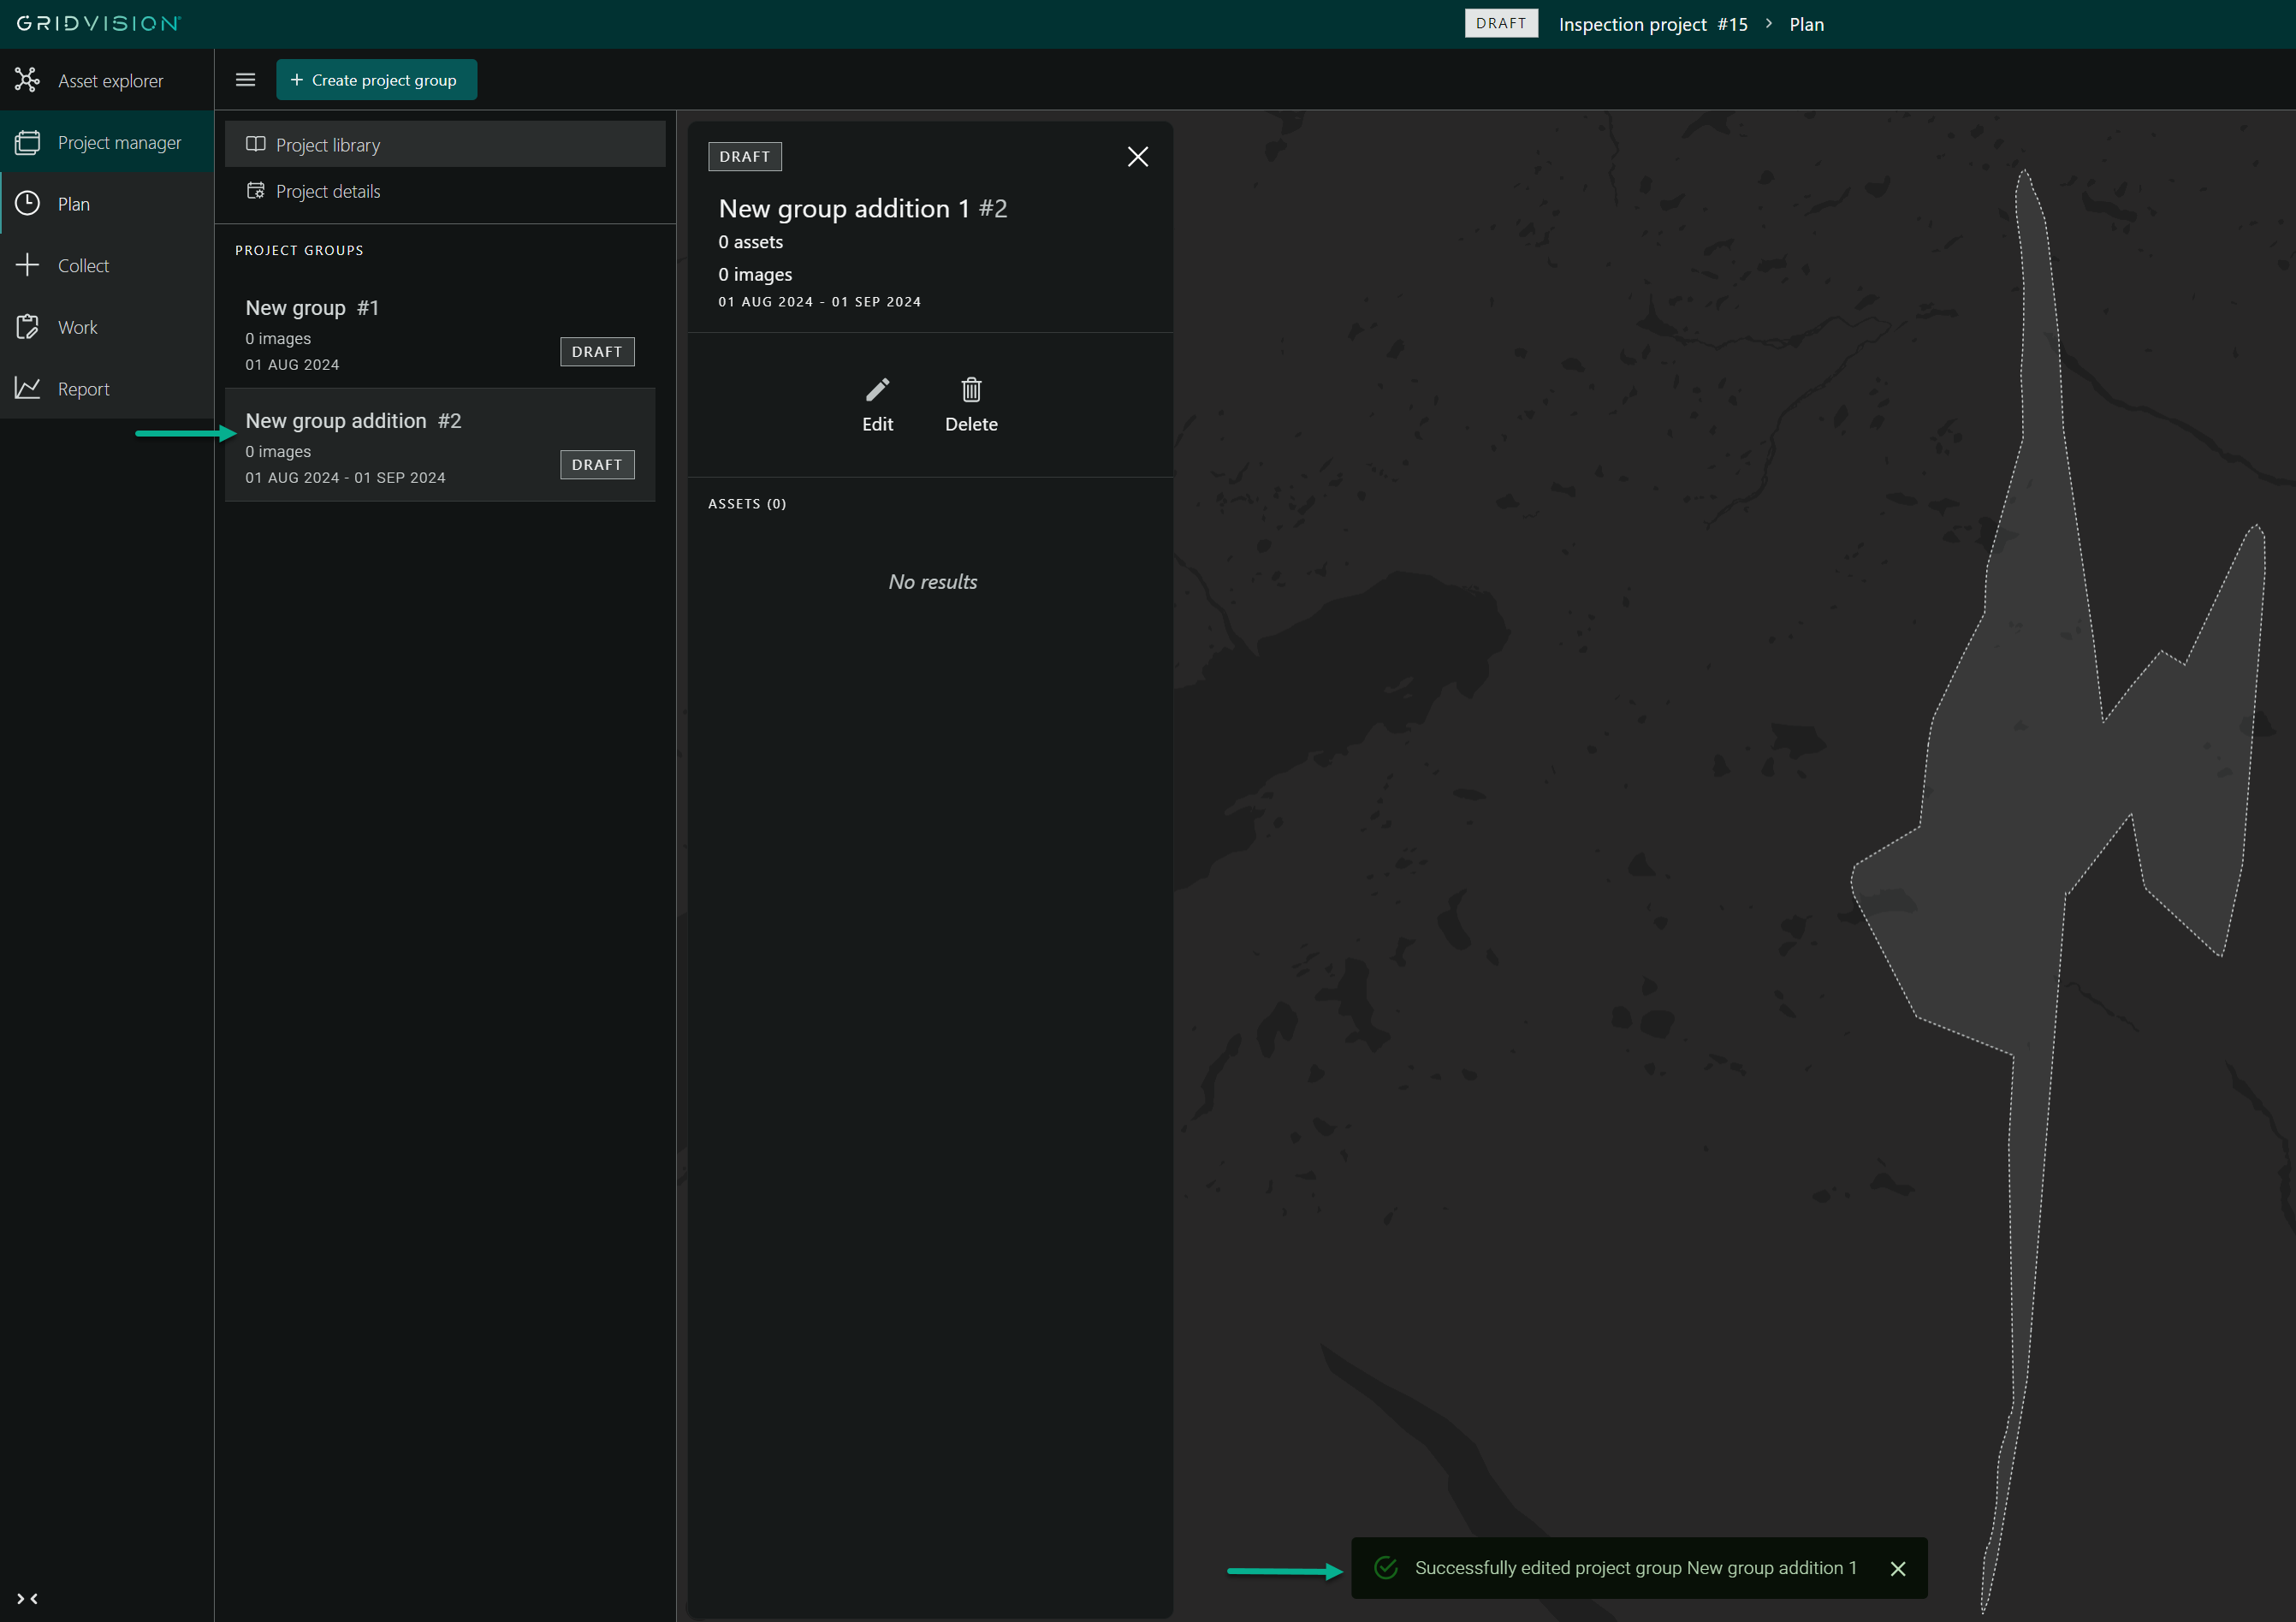
In the navigation pane on the left, click on the desired project group (e.g., "New group #1").
-
Project group compact view will automatically open, displaying:
- First section: Includes project status, project group name and number, assets and images count, and created date.
- Second section: Contains the Edit and Delete buttons.
- Final section: Shows the number of assets selected, if any.
-
Click the "Edit" button within the project group details pane in compact view.
-
Edit the desired sections and click the "Confirm" button to save the changes.
-
Ensure that the changes are reflected in the navigation pane and that a notification confirms the successful edit of the project group.
-
Follow the above steps to edit multiple project groups.
Steps to delete project group
-
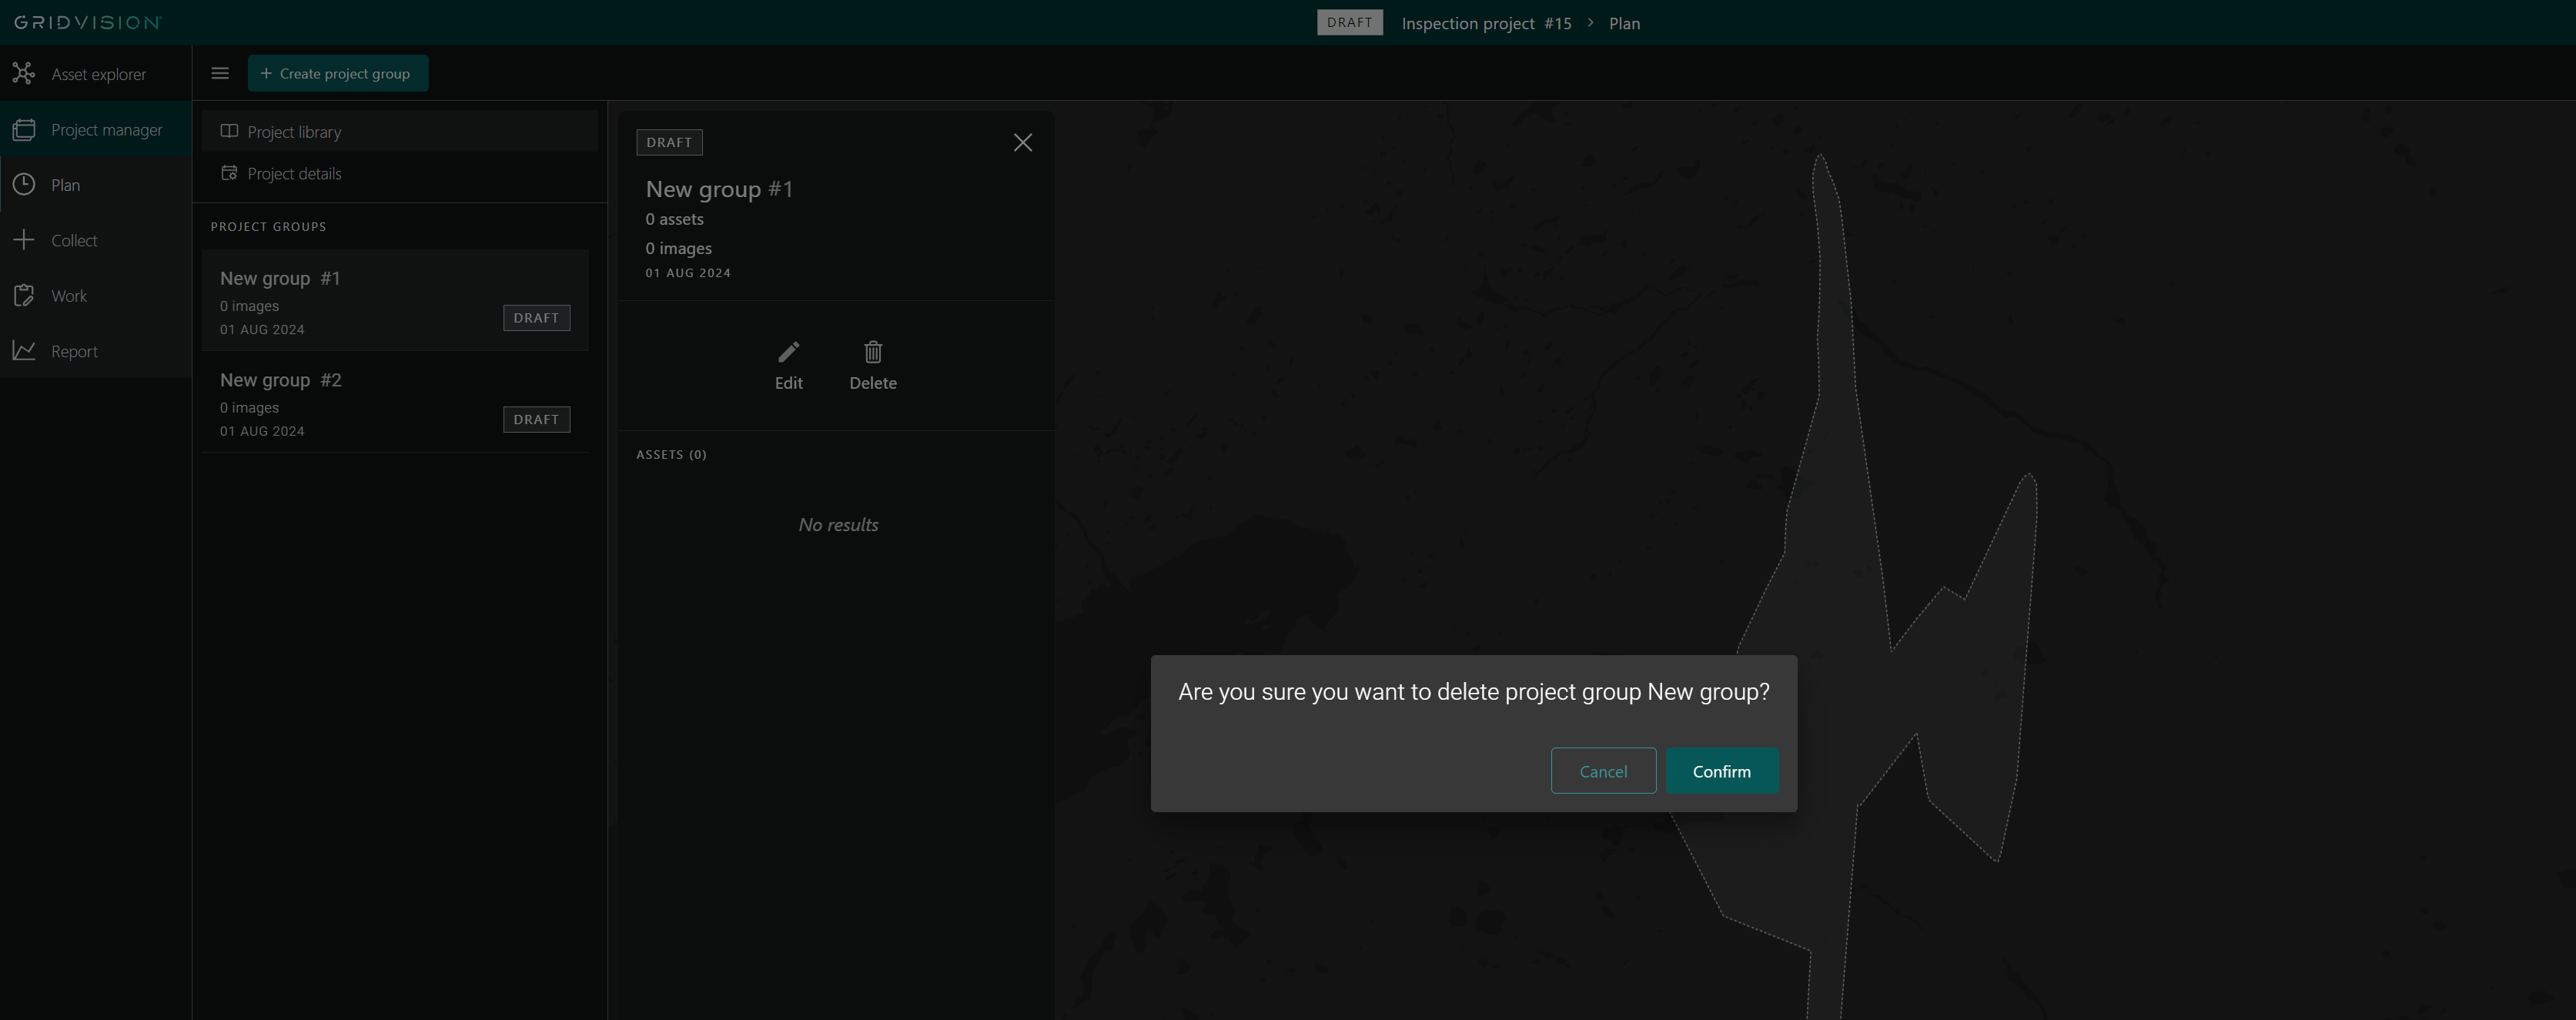
In the navigation pane on the left, click on the desired project group (e.g., "New group #1").
-
The compact view of the project group will automatically open, displaying:
- First section: Project status, project group name and number, asset and image count, and creation date.
- Second section: Edit and Delete buttons.
- Final section: Number of selected assets, if any.
-
Click the "Delete" button within the project group details pane in compact view.
-
A warning message will appear: "Are you sure you want to delete project group New group? Cancel Confirm."
-
Clicking "Cancel" will make no changes.
-
Clicking "Confirm" will delete the project group, which will then disappear from the navigation pane.
-
Ensure that the deleted project group disappear from the compact view.
- Follow the above steps to delete multiple project groups.
Steps to add assets to project groups
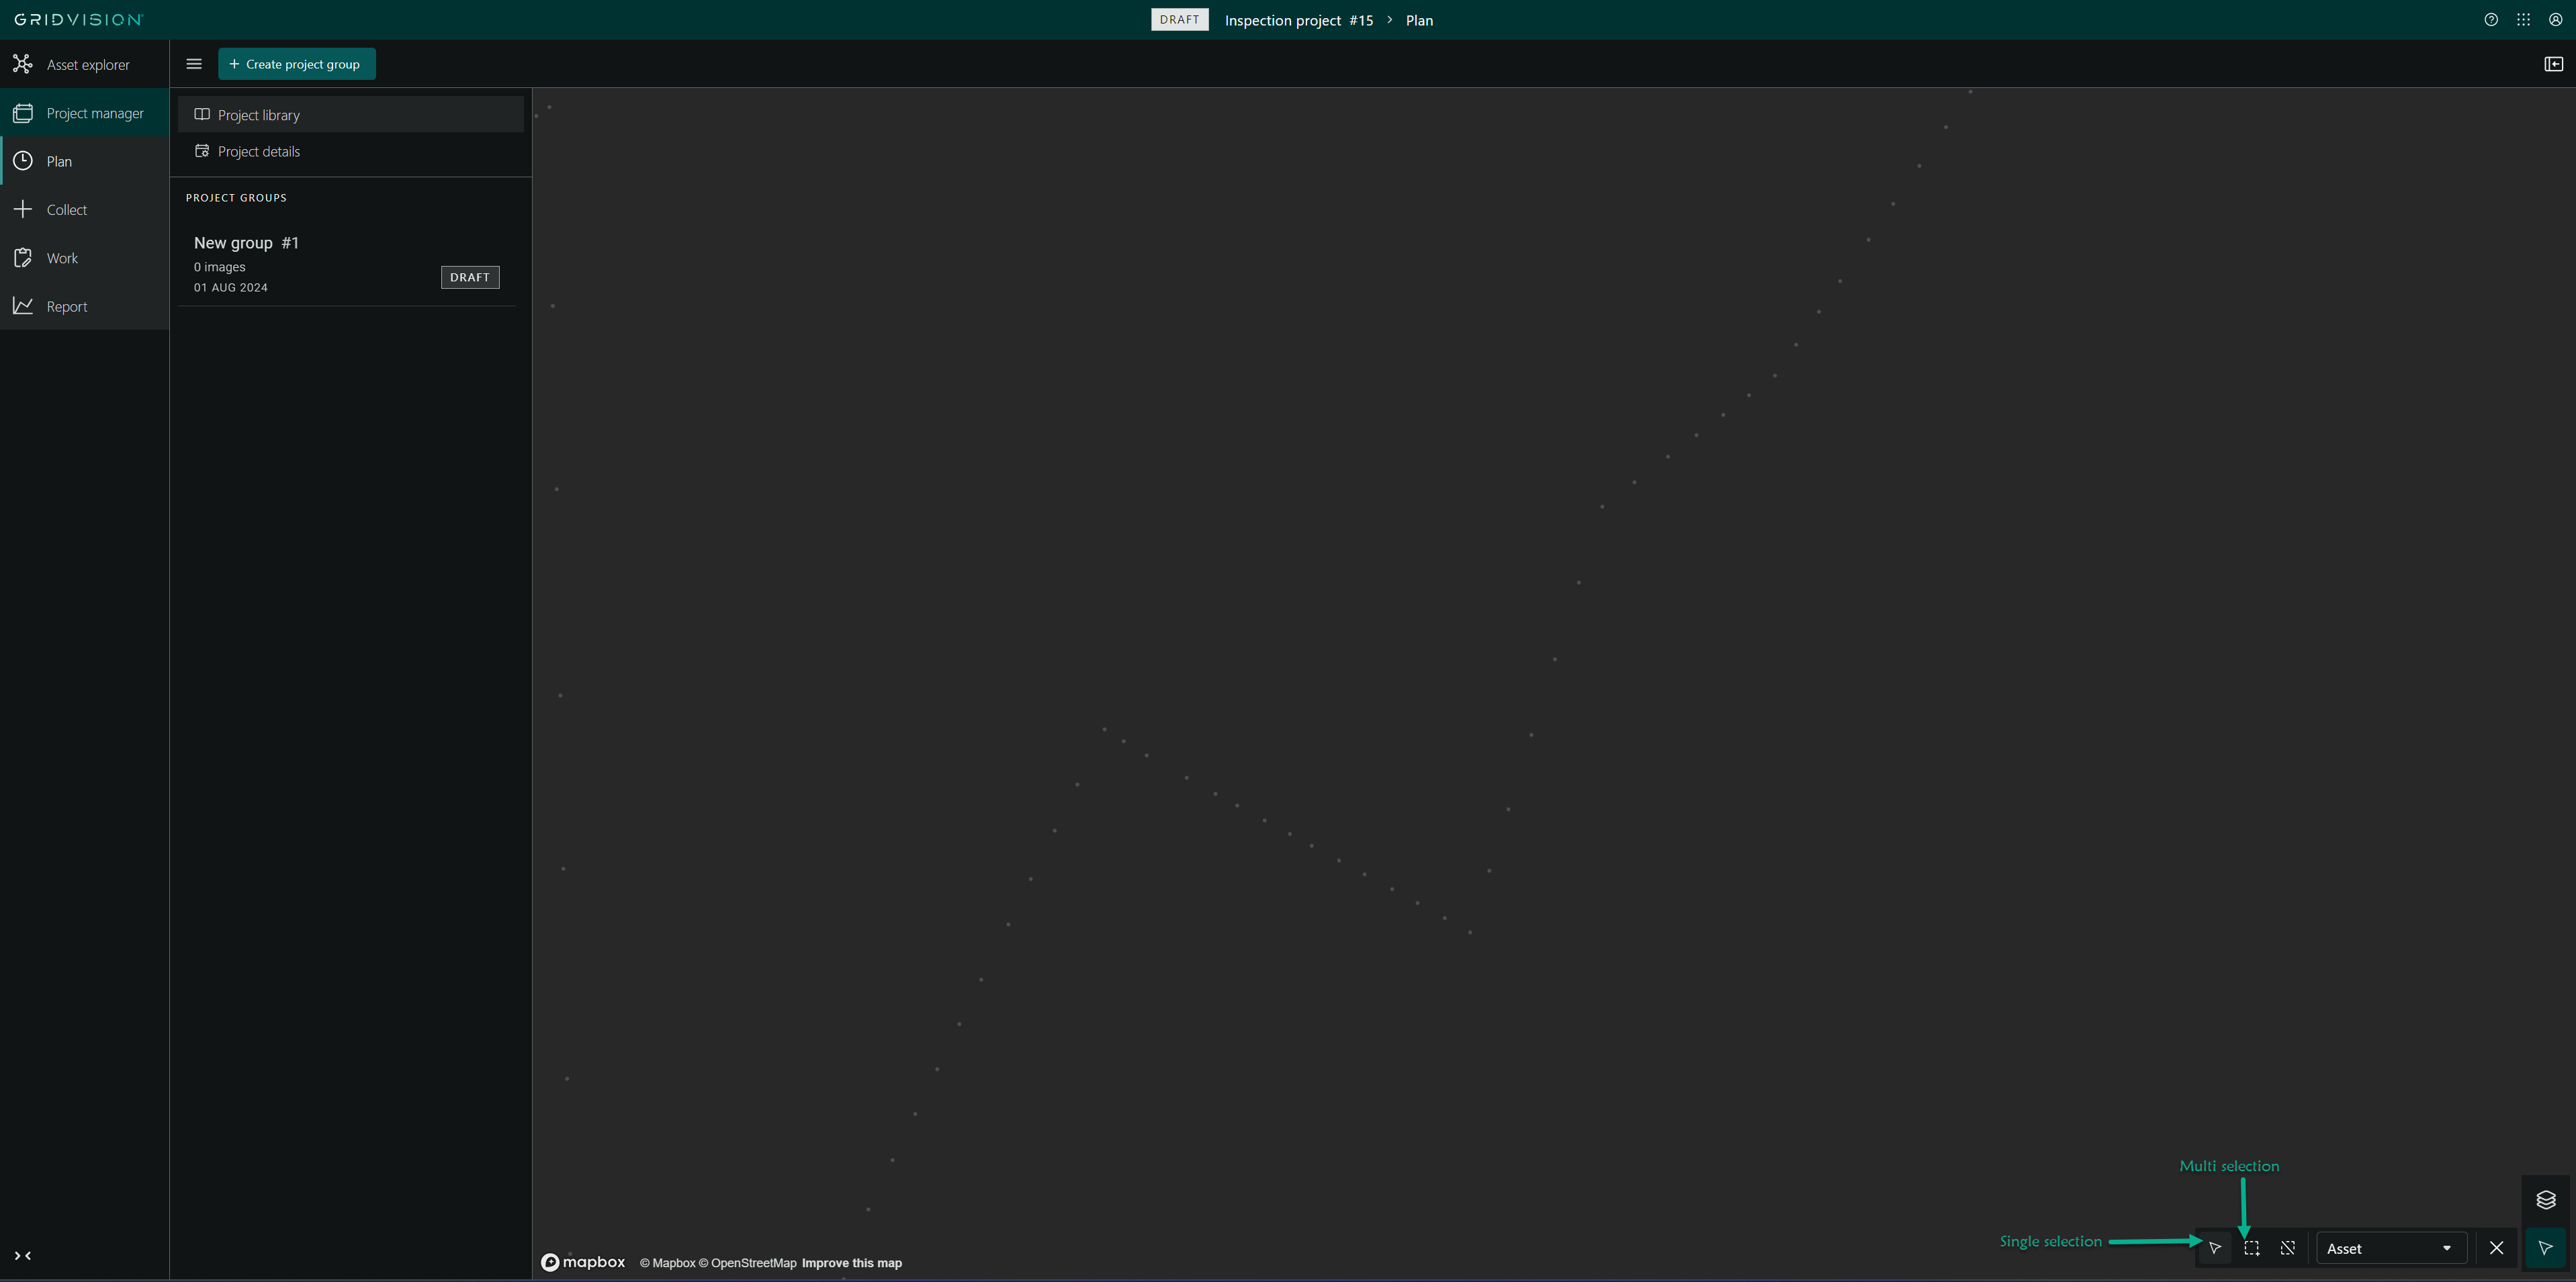
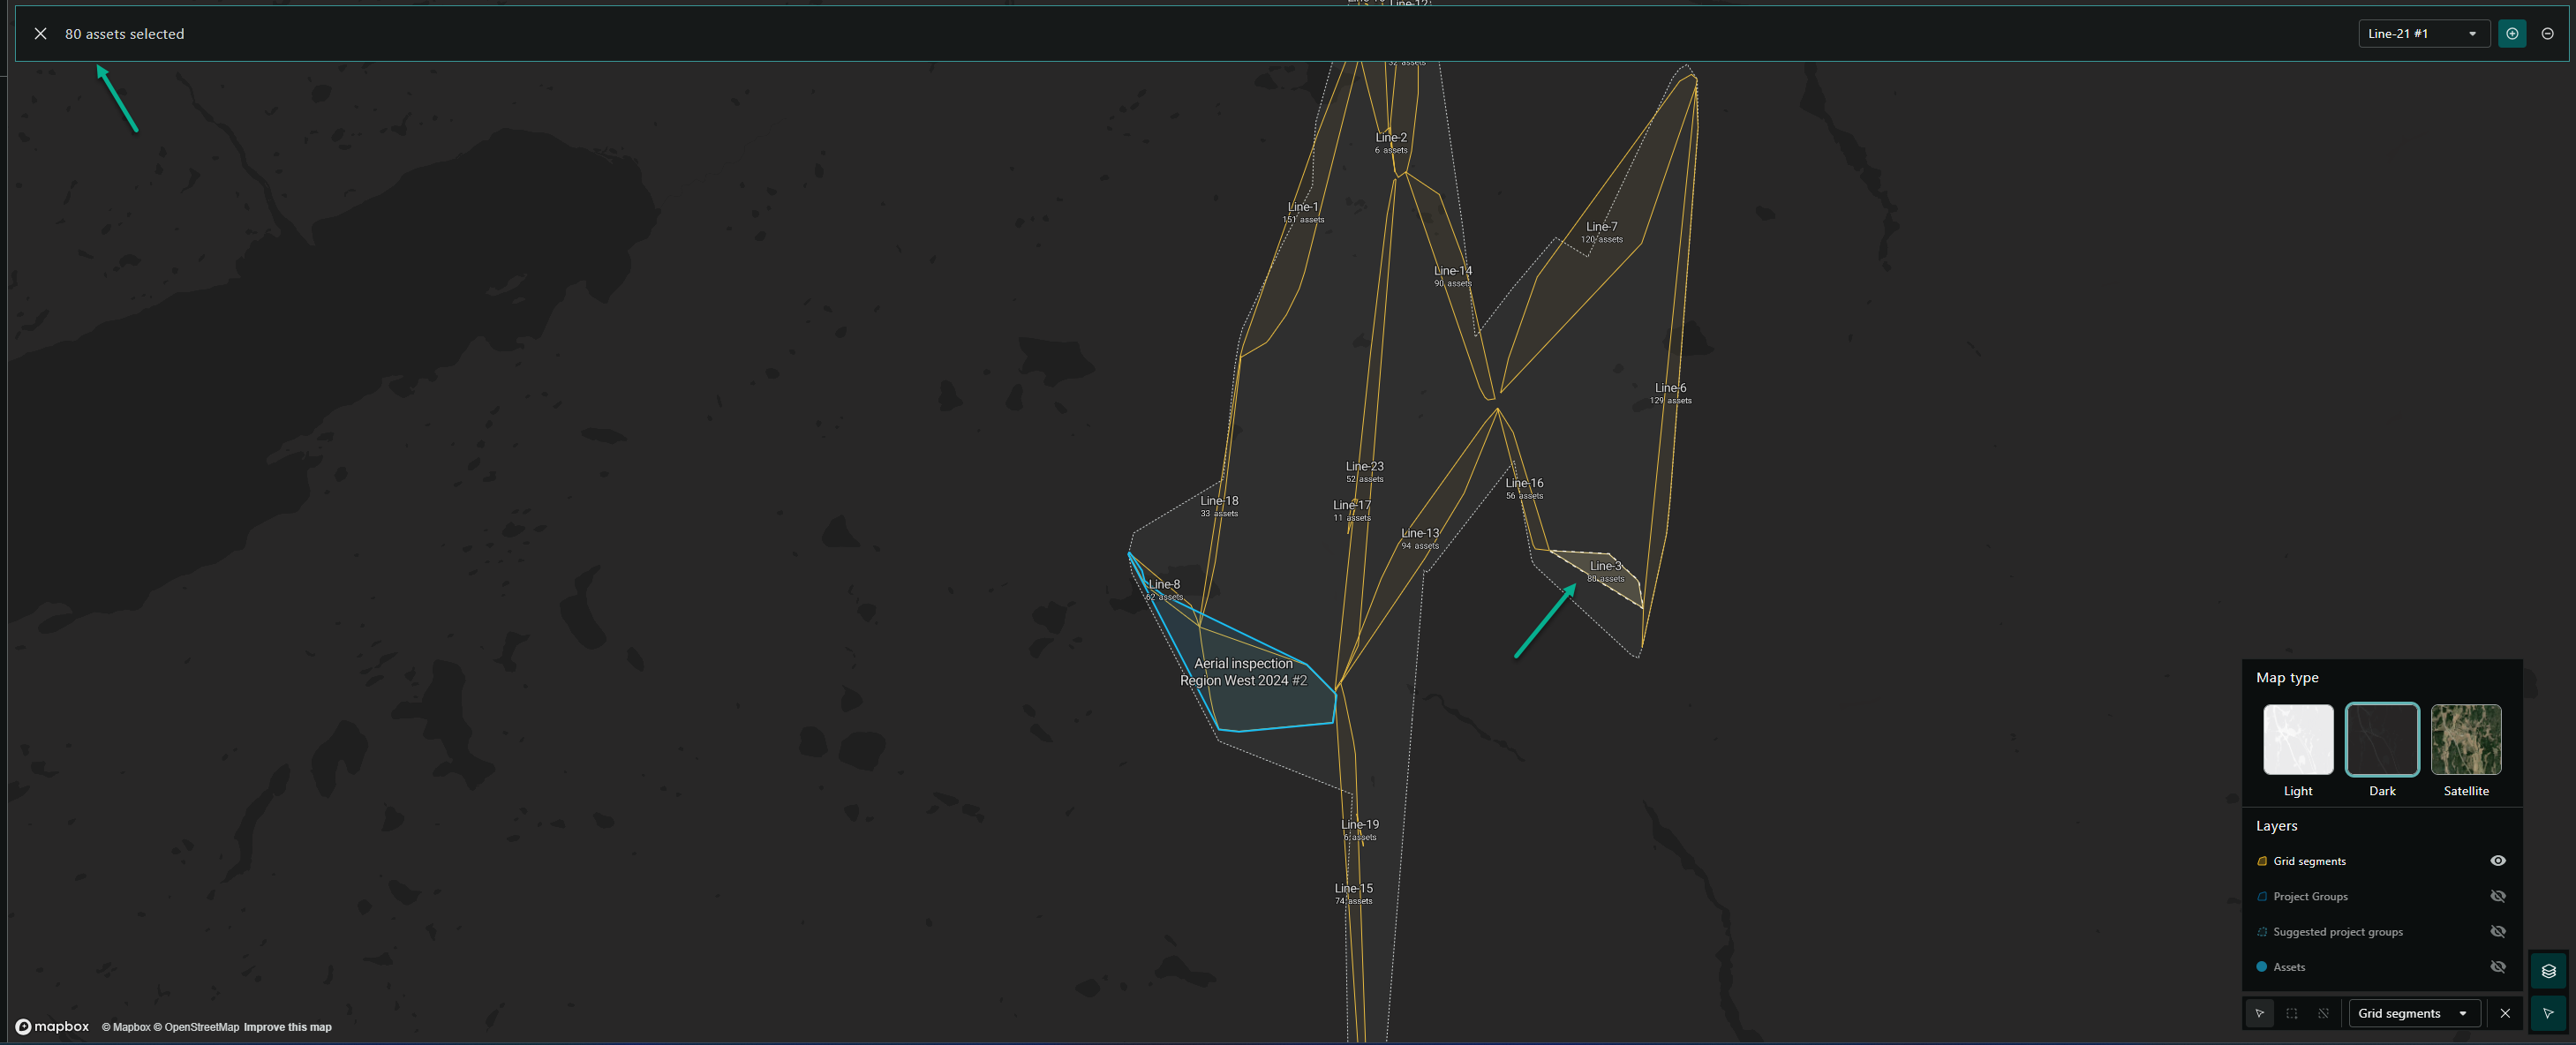
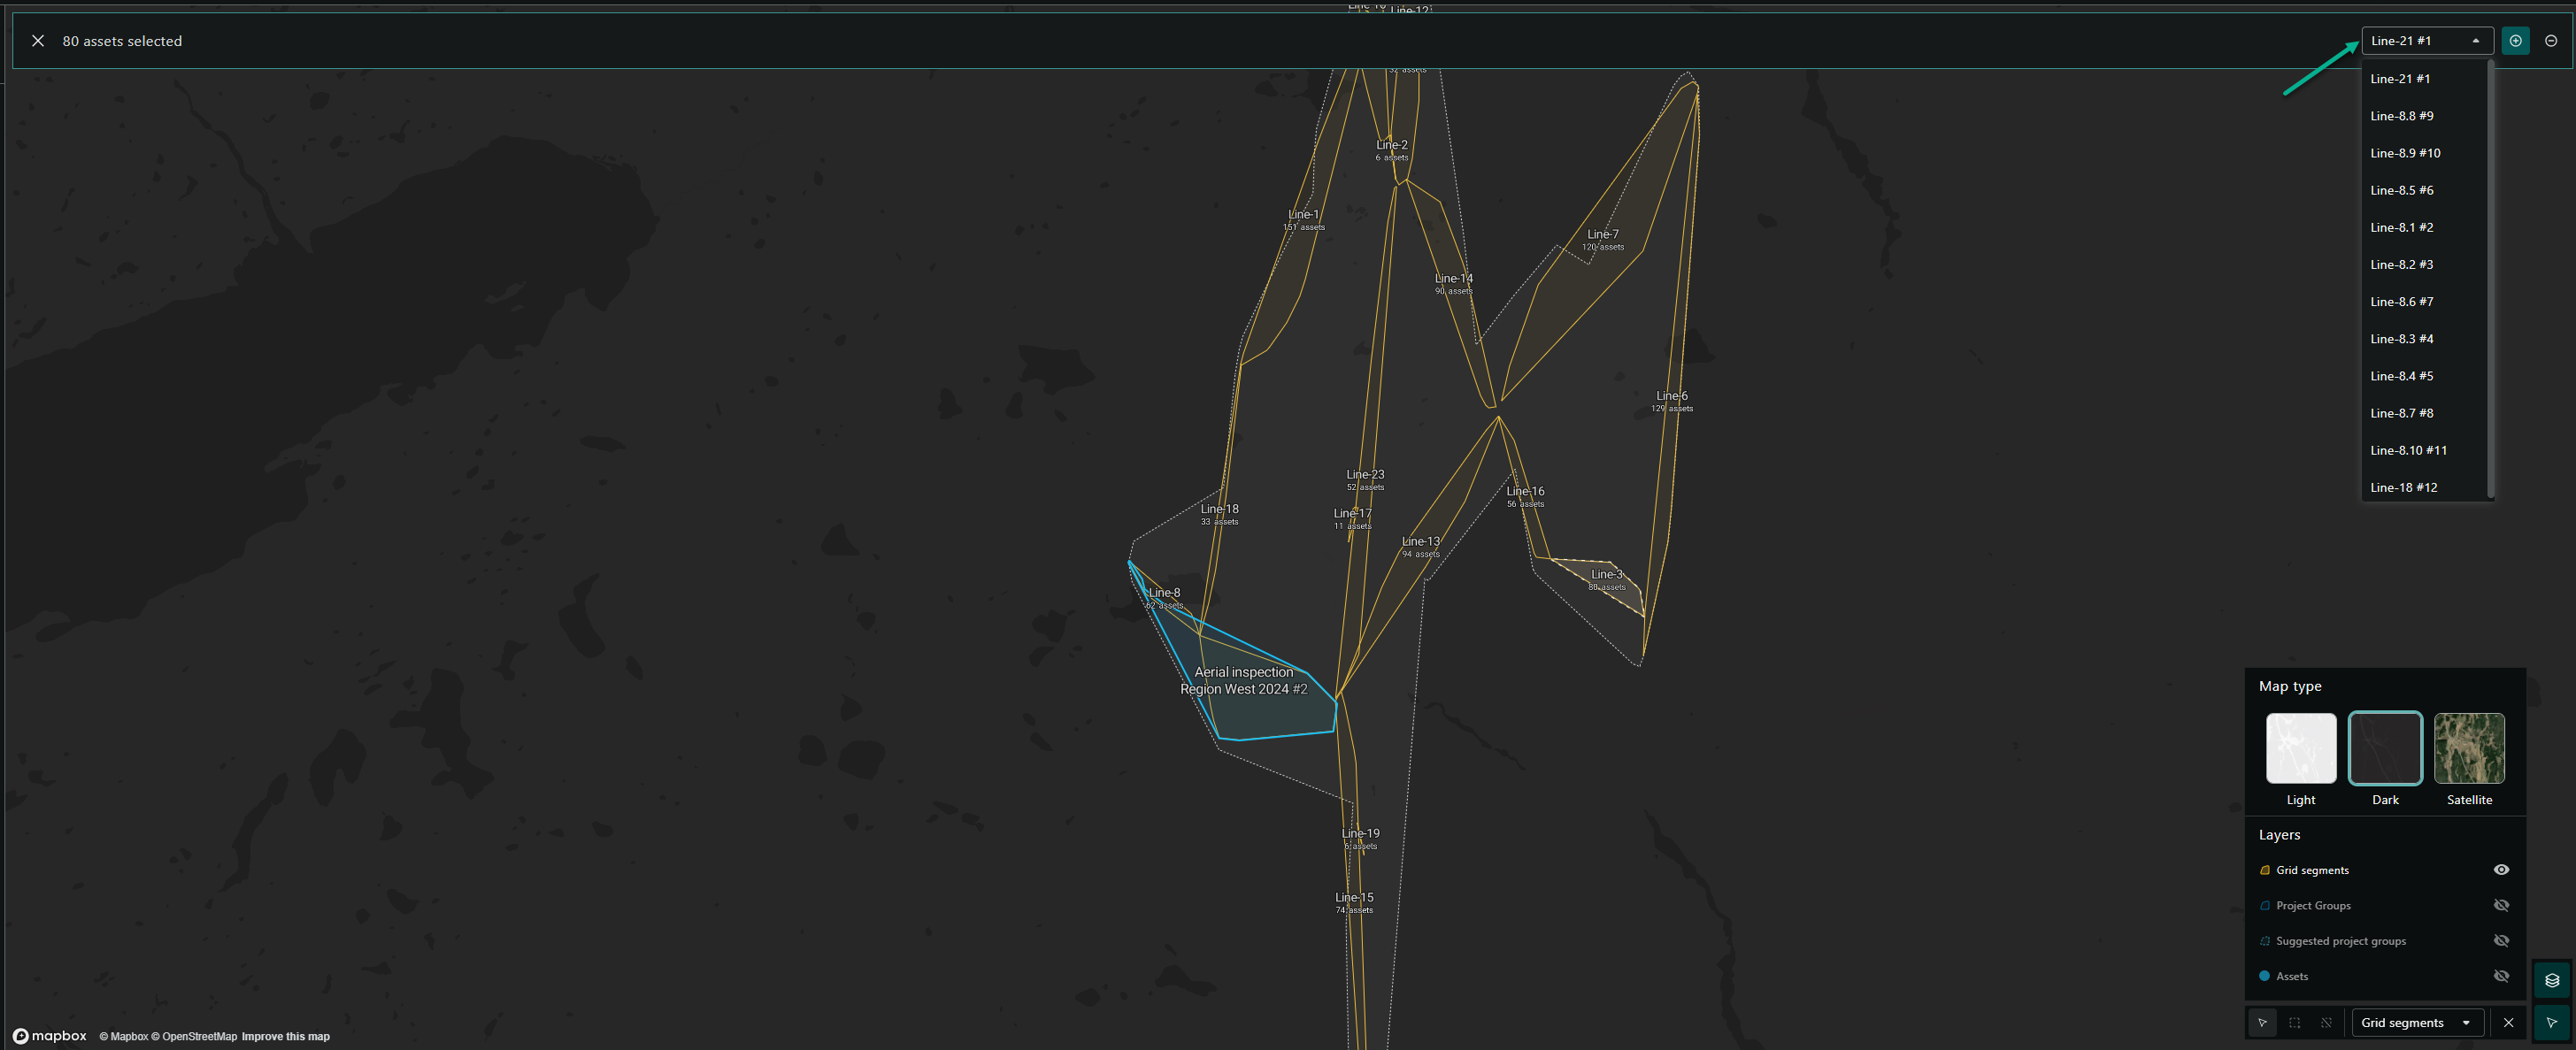
Selection Directly from the Map
-
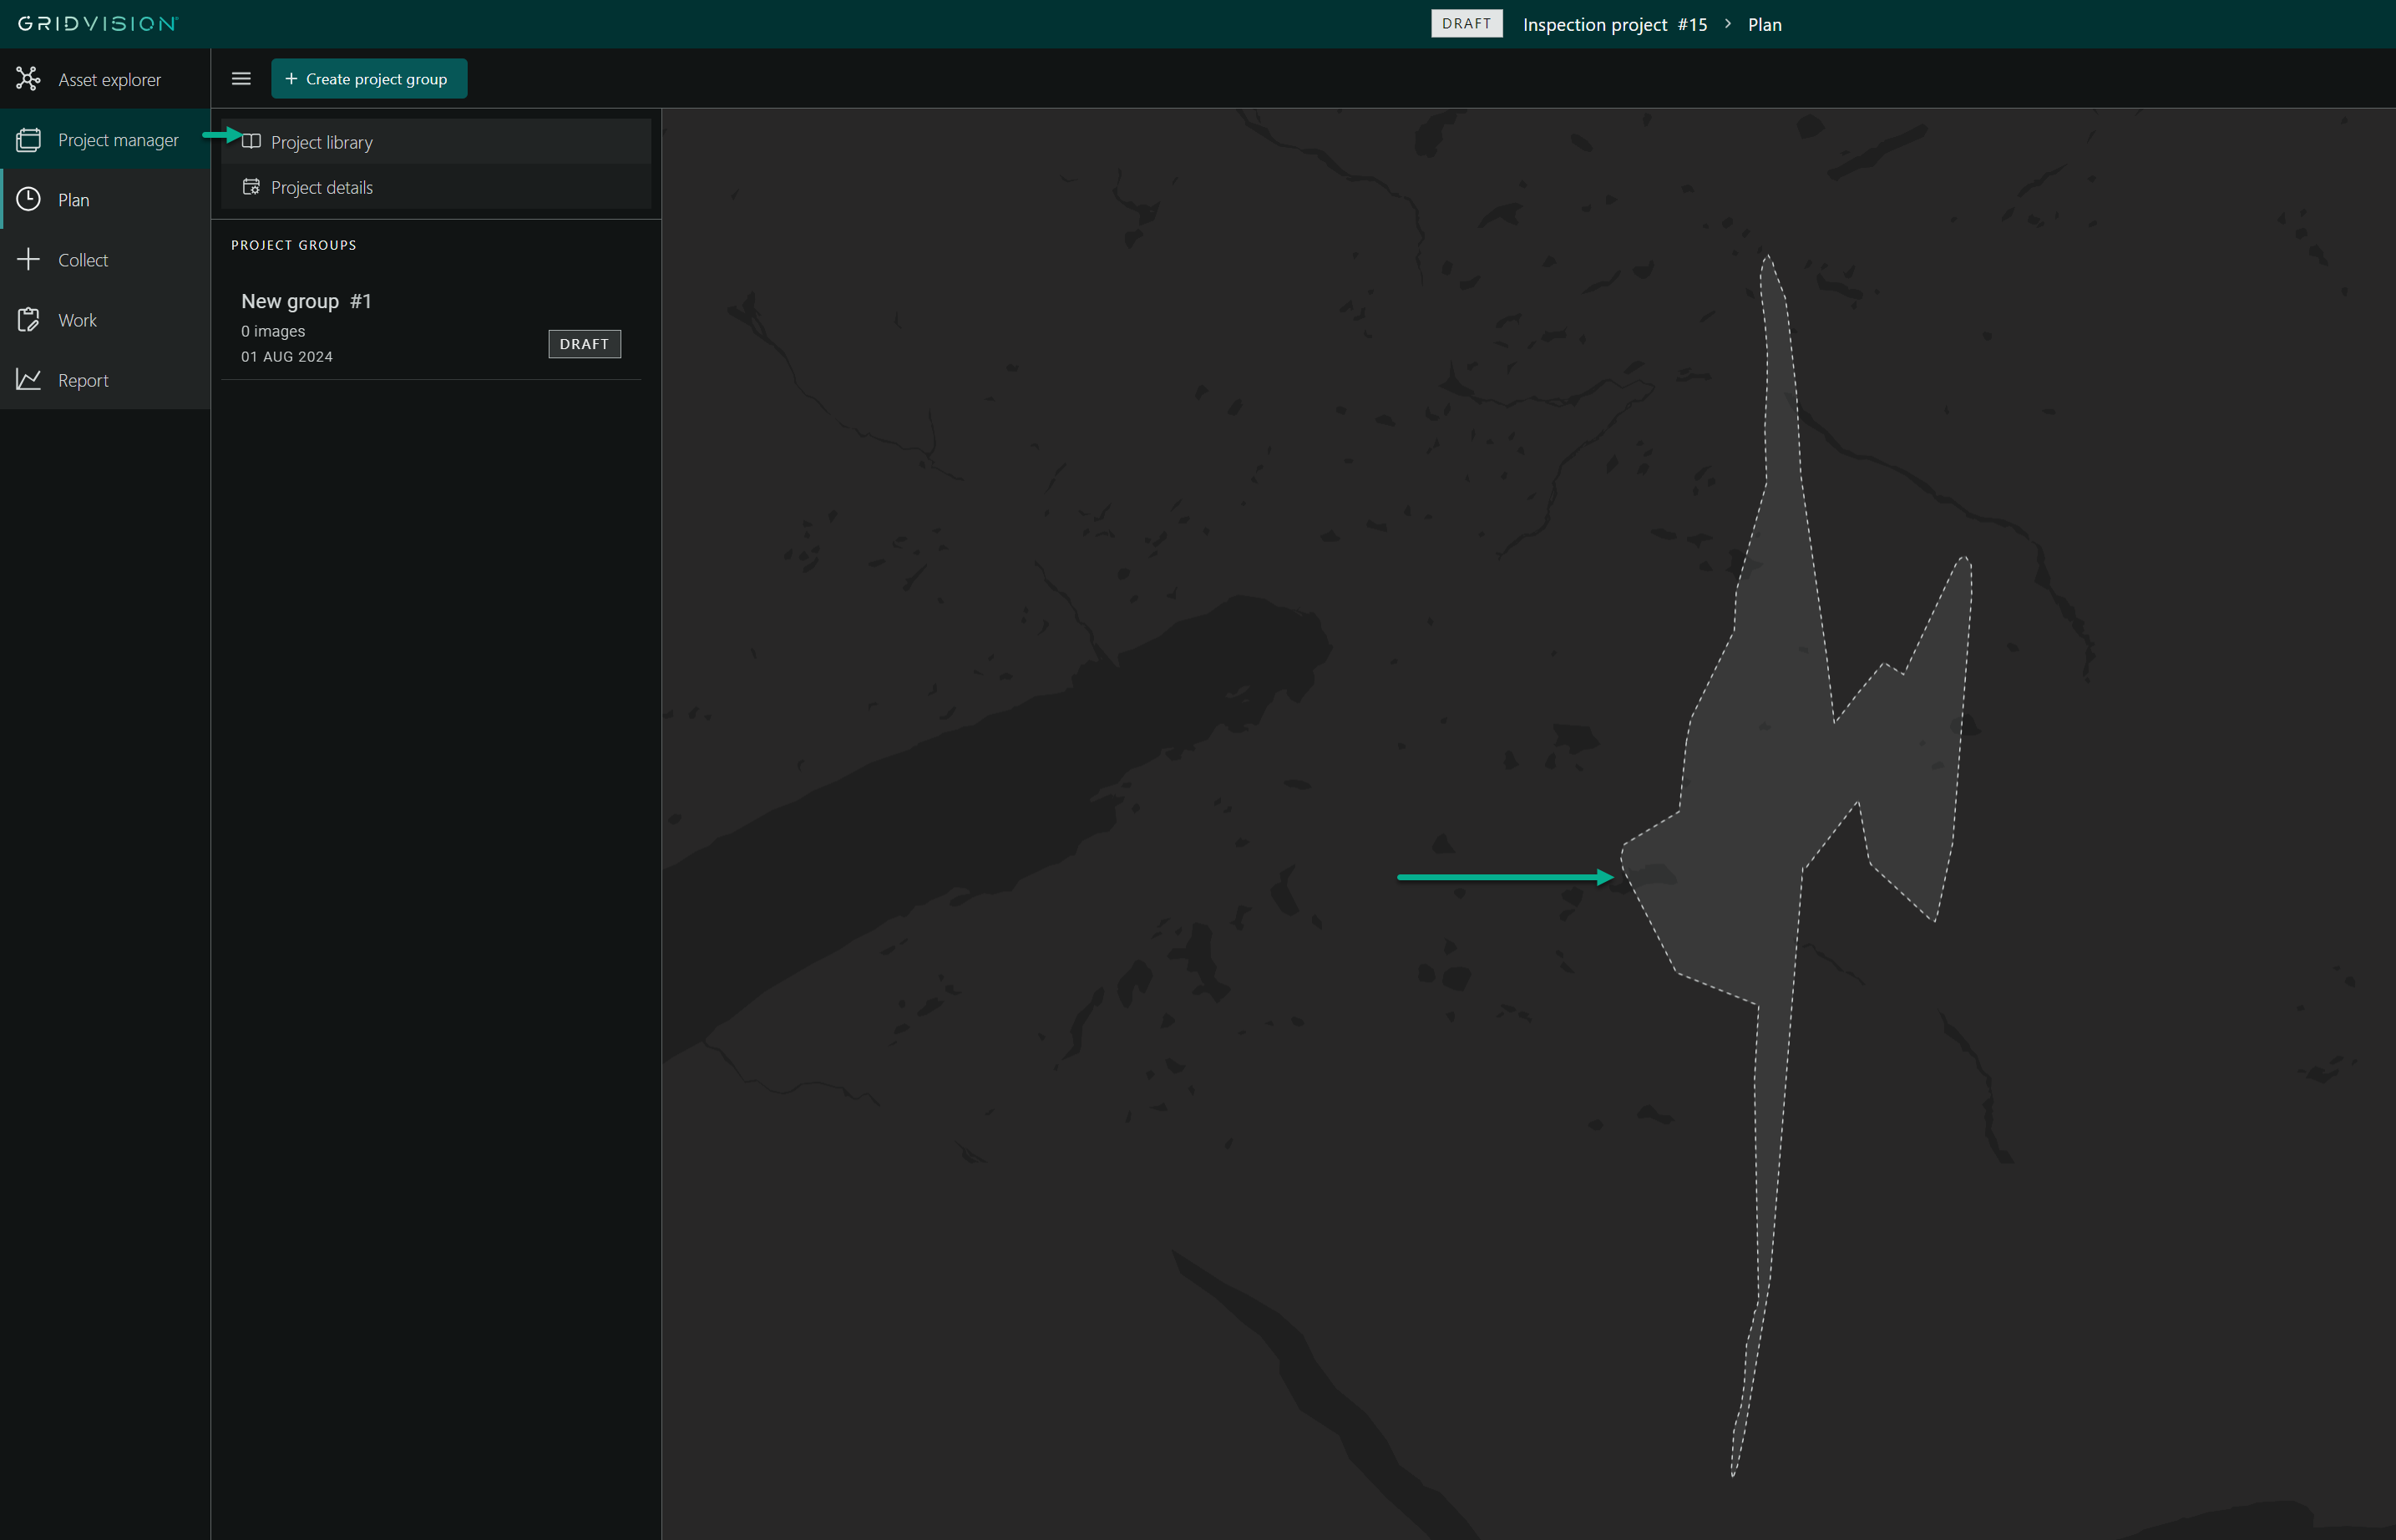
Navigate to the Project library from project details in the Navigation pane.
-
In the Project Library section, a map displaying asset polygons will be visible.
-
Use the mouse scroll wheel to zoom in and out, focusing on the area where assets need to be assigned to project group.
-
In the main content area, use the selection tool to choose assets from the map.
- Single Selection: Click on individual assets to select them one at a time.
-
Multi-Selection: Use the multi-selection tool to draw a polygon around multiple assets or click on individual assets while holding down a modifier key (e.g., Ctrl or Shift) to select multiple assets.
-
After assets are selected, a banner will appear at the top of the main content area containing the following information:
- A "Cancel" button to deselect all selected assets.
- The total number of selected assets.
- Project group drop down if project group already selected.
- Plus (+) and minus (-) buttons to adjust the selection if needed.
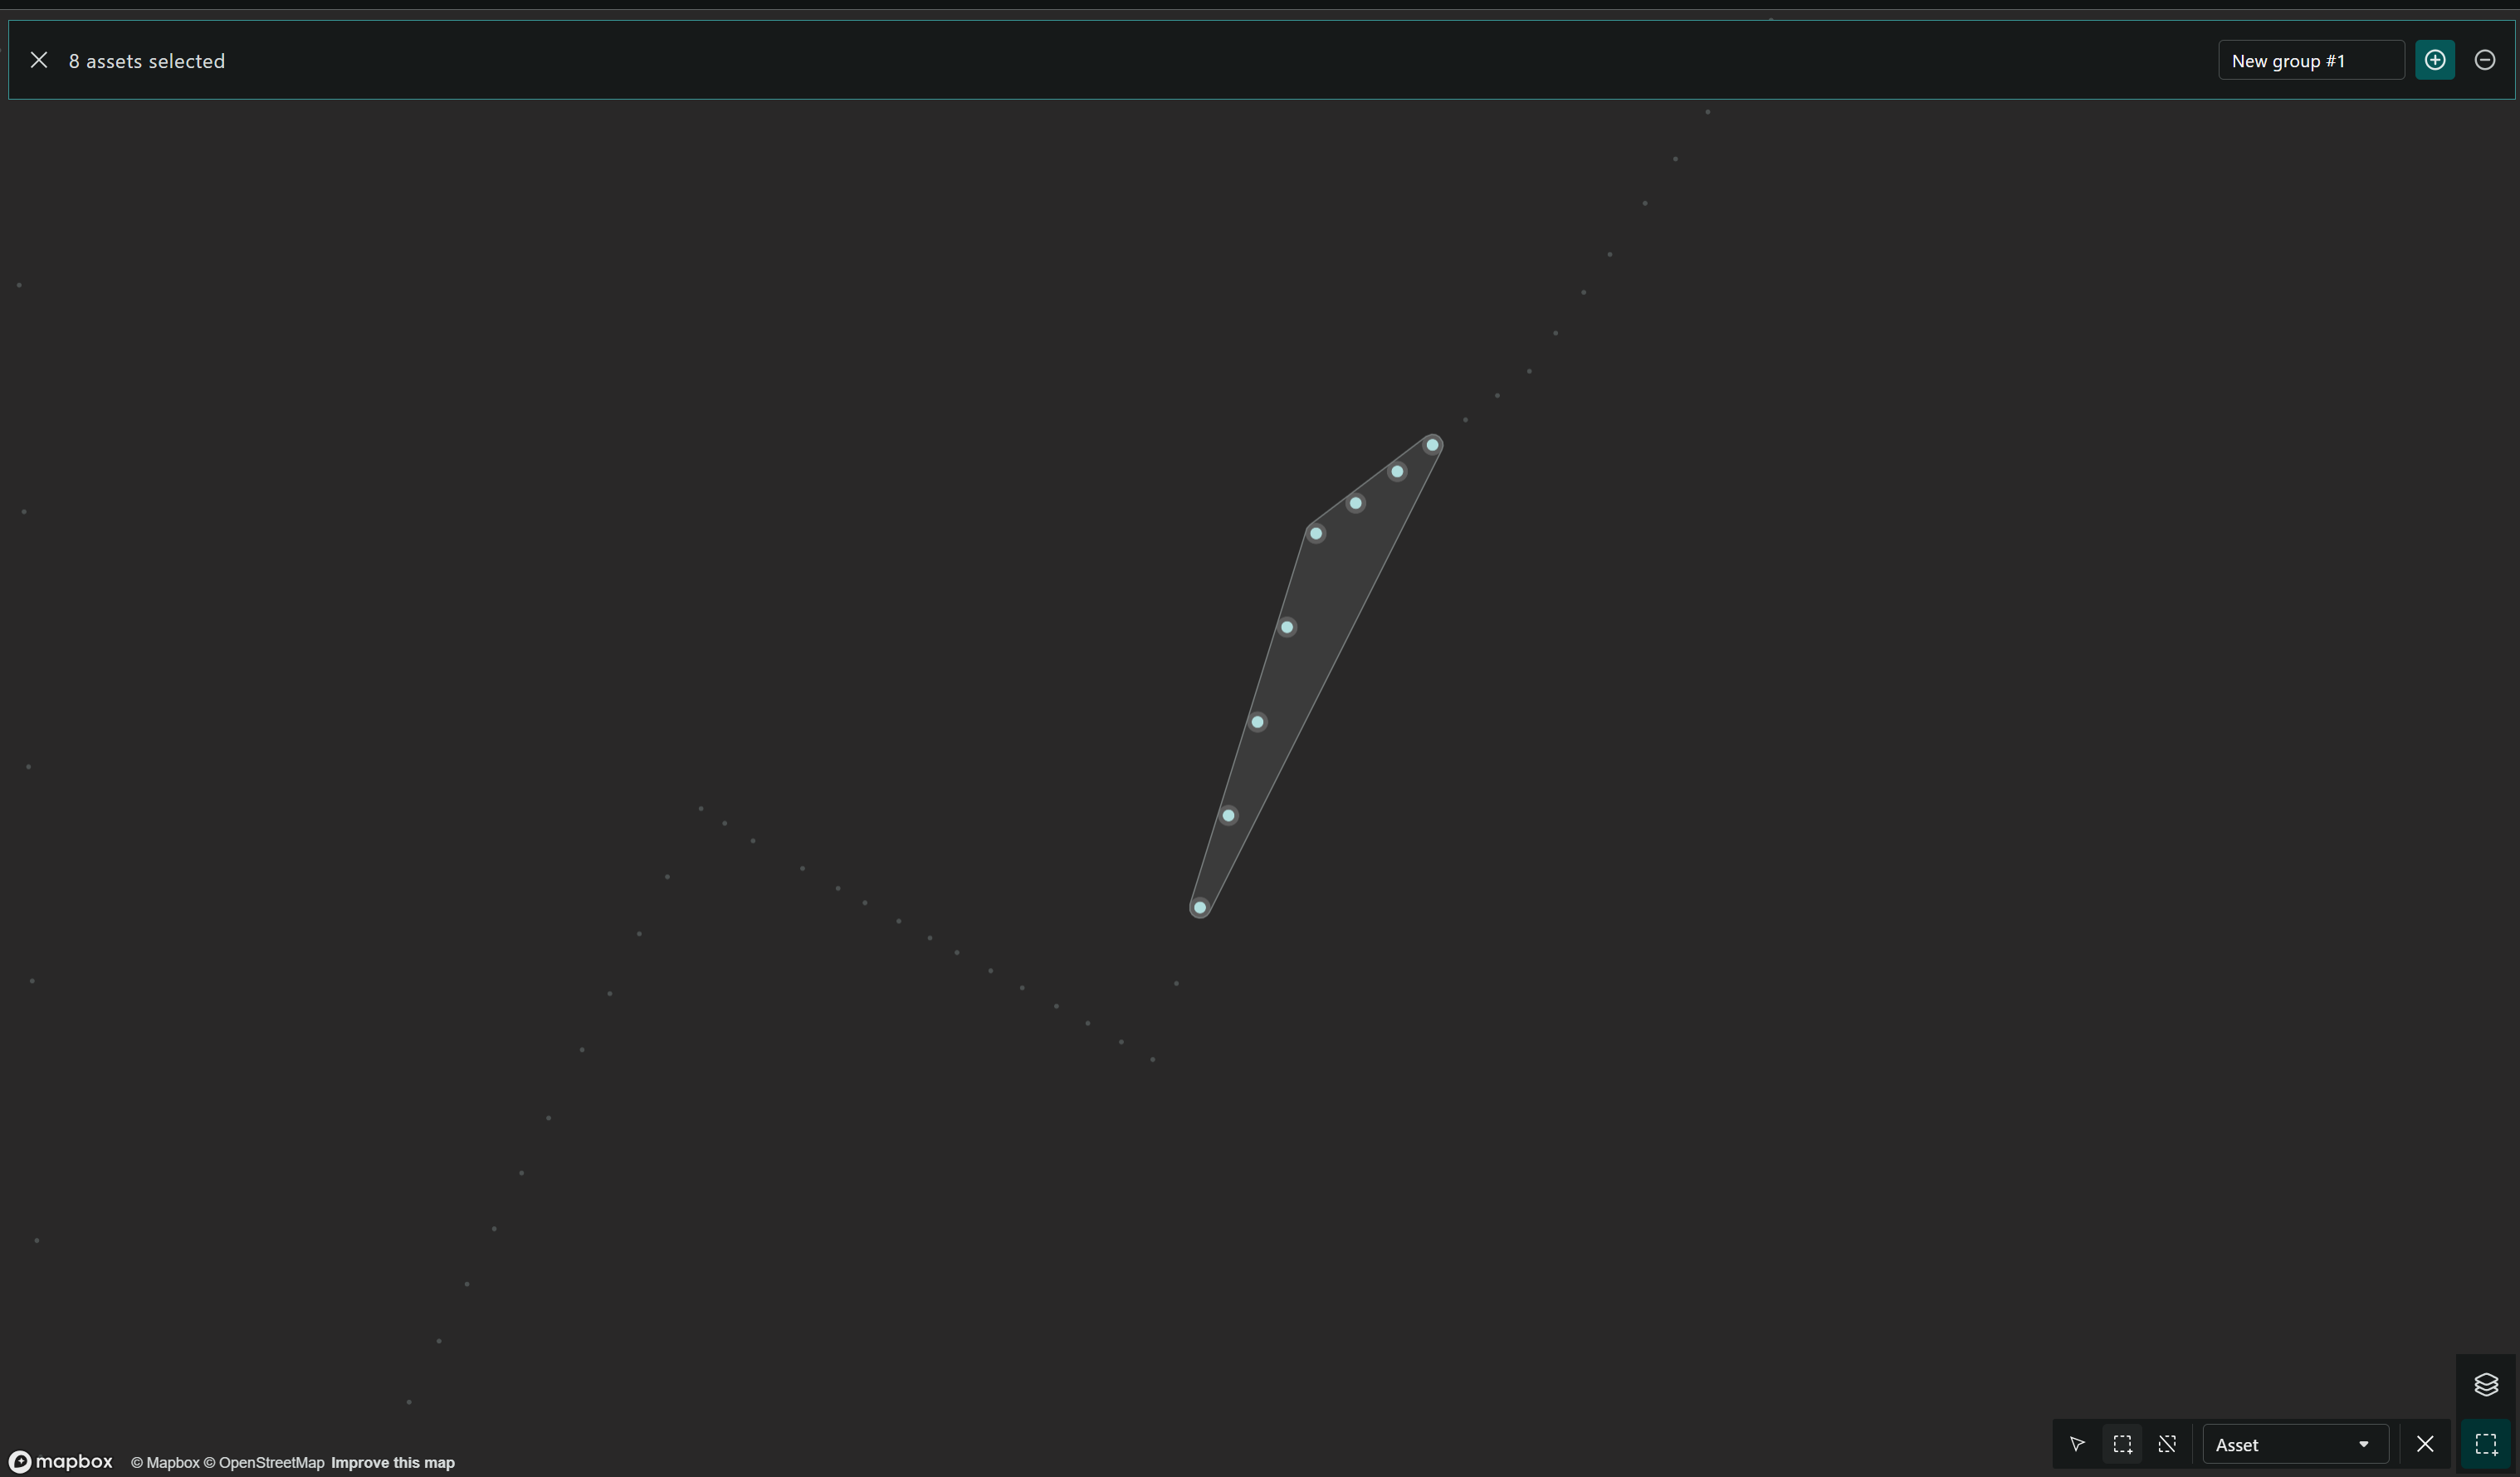
- Click the Plus (+) button in the banner. If project groups are available, a dropdown menu will appear listing them. Select the desired project group to add the selected assets to the chosen group.
- If no project groups are available, clicking the Plus (+) or Minus (-) buttons will have no effect, as there are no groups to add or remove assets from.
Selection Based on Grid Segment
-
In the map view, click on the map layer icon.

-
Enable the "Grid Segment" map layer to display all segments.
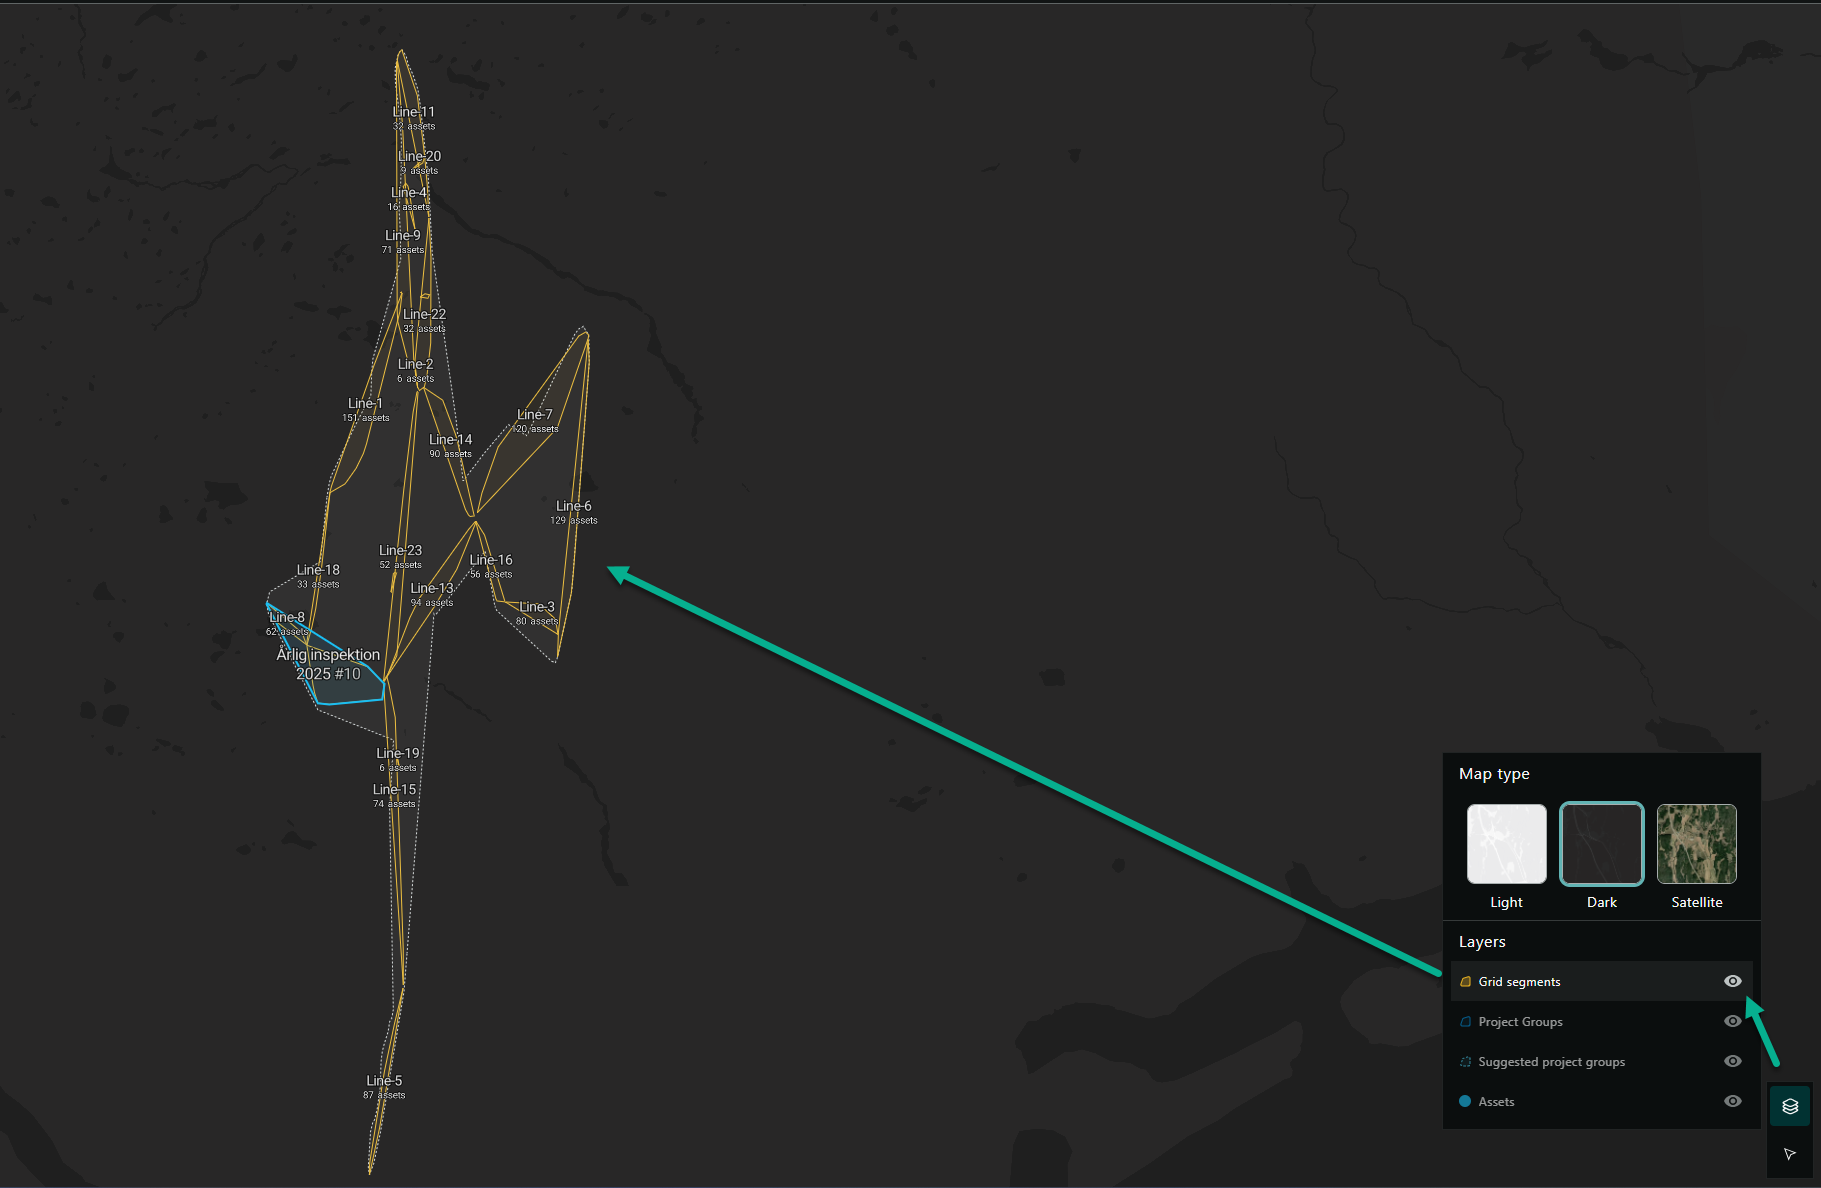
-
In the selection tool, choose the "Grid Segment" option.
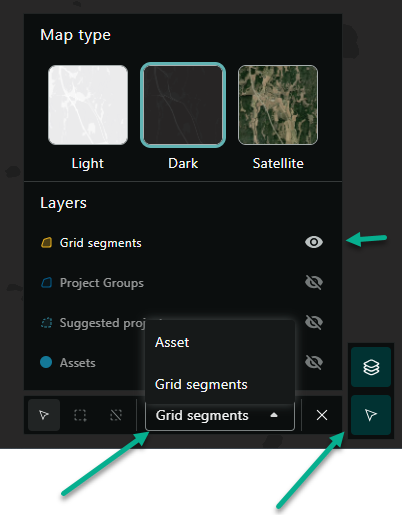
-
Click on the desired grid segment on the map. All assets within this segment will be selected.
-
Add the selected assets to the group being edited or another group as needed.
Using Suggested Groups
-
When images are added via Collect that are linked to assets outside the project, suggested groups based on grid segments will be displayed.
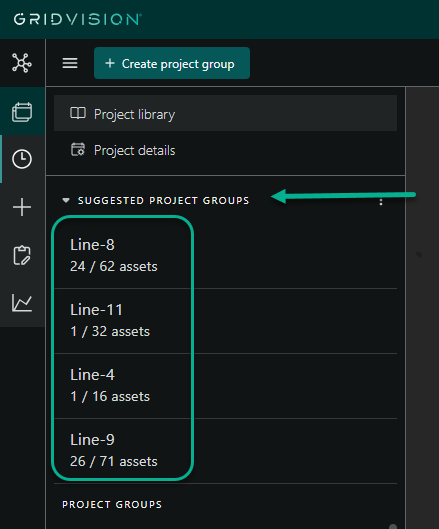
-
Review the suggested groups related to the newly added images.
- Click on a suggested group to open a compact view.
- Create the suggested group if it does not exist, or edit the selection of assets to add them to an existing group.
Steps to Edit and Remove Assets from a Project Group
- Select the project group to be edited in the navigation pane, and see the compact view opens
- Click on the Edit button
- In edit mode, it’s possible to edit Group name & dates, and remove assets not to be included by clicking the X that appears in the asset list
- When clicking the edit button, the selection tool at the bottom right corner automatically opens. From here it’s possible to select 1 or many assets in the map, and click the - icon that will remove the assets from the group.
Rules for editing a project group:
- Only possible to edit add/remove assets for a project group in compact view on Plan module
- Group name and dates can be edited in all modules, but only for groups in Draft or Collected state
- Groups in Approved state is not possible to edit in any way
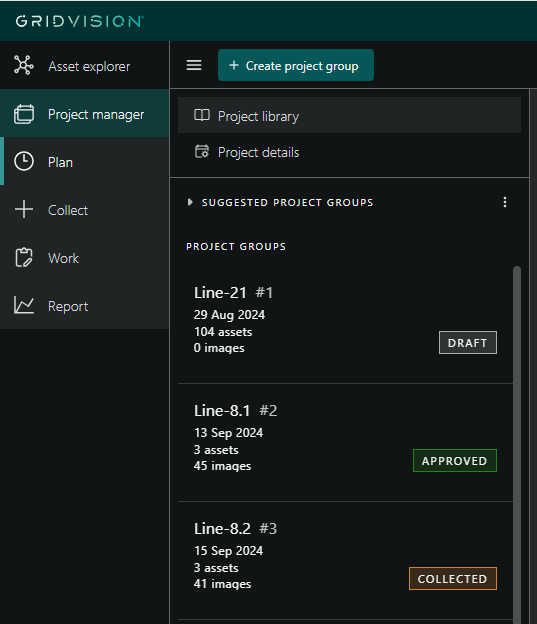
Status of the Project groups
A project group can be seen as a subproject and has it's own statuses to describe the state it's in.
- Draft: The project group has been created and assets may have been included in the scope.
- Collected: Data has been imported and linked to the project group and it has been confirmed that the linked data is sufficient to begin the work (e.g. Inspection). When the status is changed to Collected, all linked data is permanently stored and automatic processing, such as AI component and defect detection, is initiated. Data that was not linked to the asset at the point of changing the status, can no longer be included in the project even if it had been imported at the time of the status change.
- Approved: When the inspection and any necessary quality assurance is completed the project group can be changed to status "Approved". This is a final confirmation that the information registered in the project is correct. The data from the approved project group is now available in Report and Asset Explorer for anyone to see. Since it's published for anyone with access to the Report and Asset Explorer the data must be trustworthy, since it can be used to make business decisions. Therefore it's no longer possible to make any updates to the project group after it has been set to "Approved".