Projects
- Deutsch: Diese Seite ist nicht ins Deutsche übersetzt
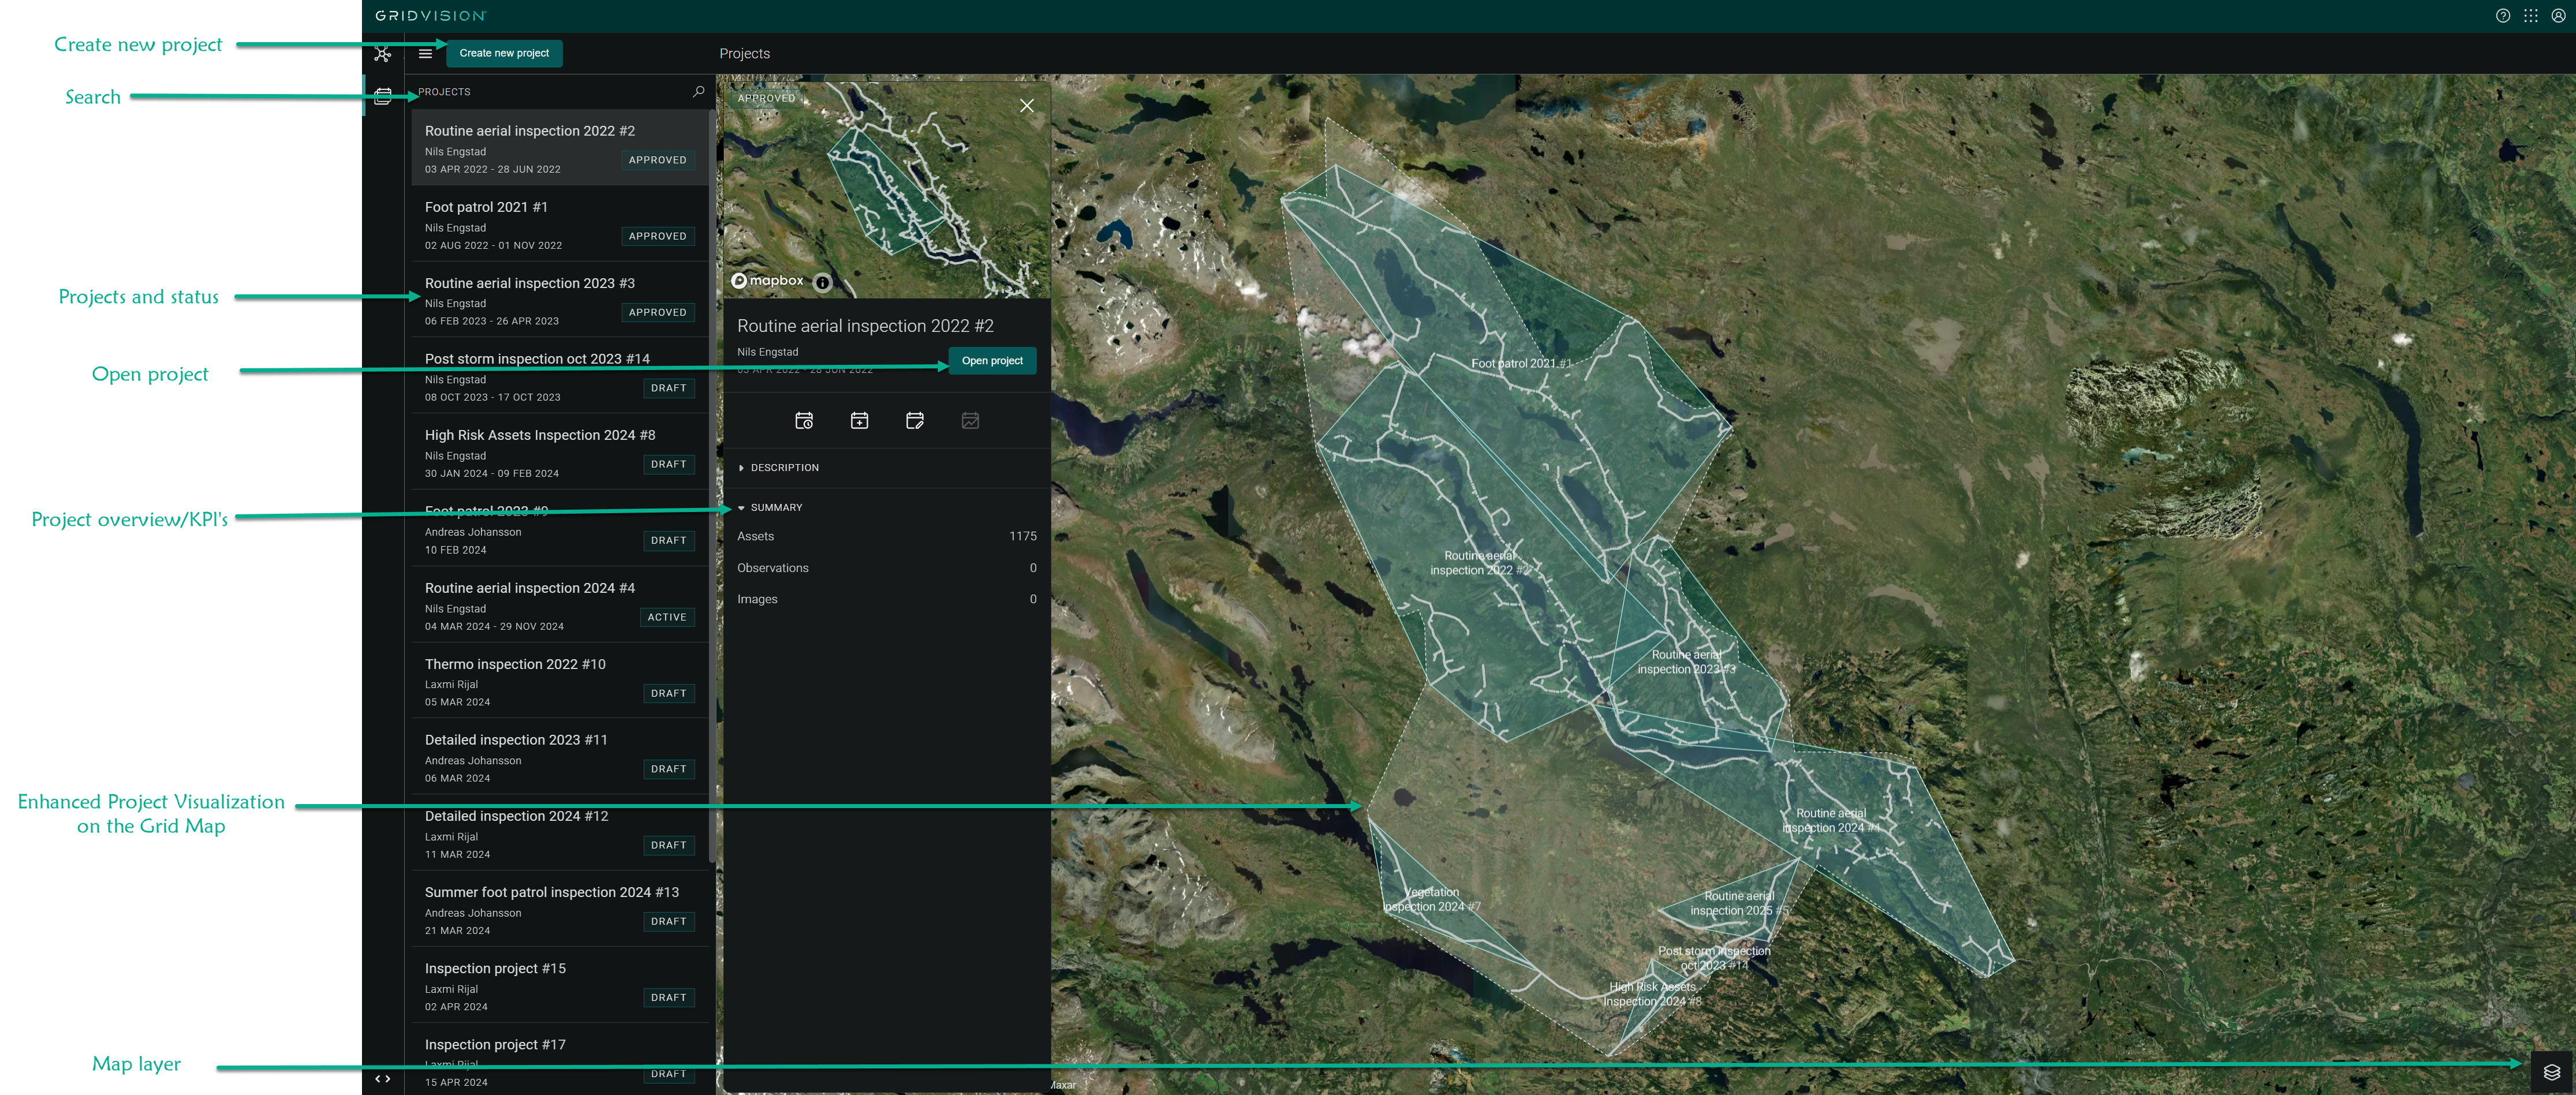
When signing in to Grid Vision, you access the Project Manager page. If no projects have been created you will only see the imported assets. Projects with assets are shown on a map, and you can search and view key details for each project.
-
Create New Project Button: Located in the navigation pane, allows you to create a new project.
-
Search Feature: Use the search feature to quickly locate specific projects by name or project number.
-
Projects and Status: View a list of projects along with their current status in the navigation pane.
-
Project Overview/KPIs: Access key project information and KPIs in the compact view area.
-
Open Project Button: Click on this button to open and view detailed information for a selected project.
-
Enhanced Project Visualization on the Grid Map: Utilize this feature to visualize project assets within the grid map for effective planning and management.
-
Map type: Access default or Satellite map to customize the visualization of project assets and grid infrastructure.
Steps to Create a New Project
- Navigate to the Project Manager and click on the "Create New Project" button.
-
You will be redirected to the project details page and a new project is automatically created with default settings:
- Name: "Inspection Project" (can be edited)
- Project Number: Automatically assigned
- Start Date: Default value (can be edited)
- Owner: Assigned to the project creator
- Status: Initially set to Draft
-
Customize the project details:
- Project Name: Modify the default name if needed.
- Start Date: Set this to the date the inspection should be started.
- End Date: Specify the date by which the inspection should be completed.
- Description: Optionally, add any additional information in the description field.

-
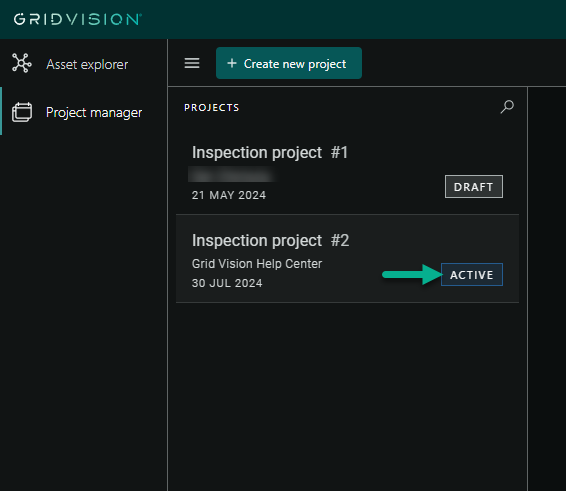
After that click the "Set to Active" button at the top of the main content area to activate the project. This action allows other users to continue planning.
-
Draft status disappear from the screen and Active status will be visible in the app bar.

-
Returning to the Project Manager will show the updated status as Active.
-
The information is automatically saved.
Search feature
This feature allows you to quickly find specific projects within the Project Manager. Follow these steps to effectively use the search feature:
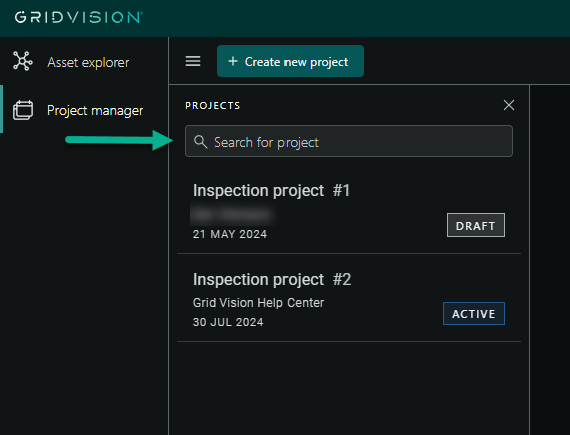
- Locate the search bar at the navigation pane of the Project Manager landing page.
- Click on the search bar and type in keywords related to the project, such as project names, project number, or other relevant details.
- Review the list of matching projects that appears below the search bar as typing progresses.
- Scroll through the results to find the desired project.
-
Click on the selected project from the list to open it in the compact view, where main details are visible and navigation to submodules is possible.
Refine the Search (if needed):
- If the initial results do not show the desired project, adjust the keywords and search again.
- Use more specific terms or correct any typing errors.
Tips for Effective Searching
- Use Specific Keywords: Enter precise and relevant keywords to improve search results.
- Check Project Details: If multiple projects have similar names, verify details in the compact view to ensure the correct project is selected.
Project status in the landing page
-
Draft: Initial status, allows full modifications, no activities should start unless instructed.
-
Active: Set from "Draft", ready for execution, allows full modifications.
-
Approved: Set from "Active", complete and reliable data, no modifications allowed, you can view and export data.
-
Cancelled: Set from "Active", terminated and unreliable data, no modifications allowed, you can view and export data.
Project Overview/KPIs
-
In the navigation pane on the left, click on the desired project (e.g., "2023 Migrated Data #2").
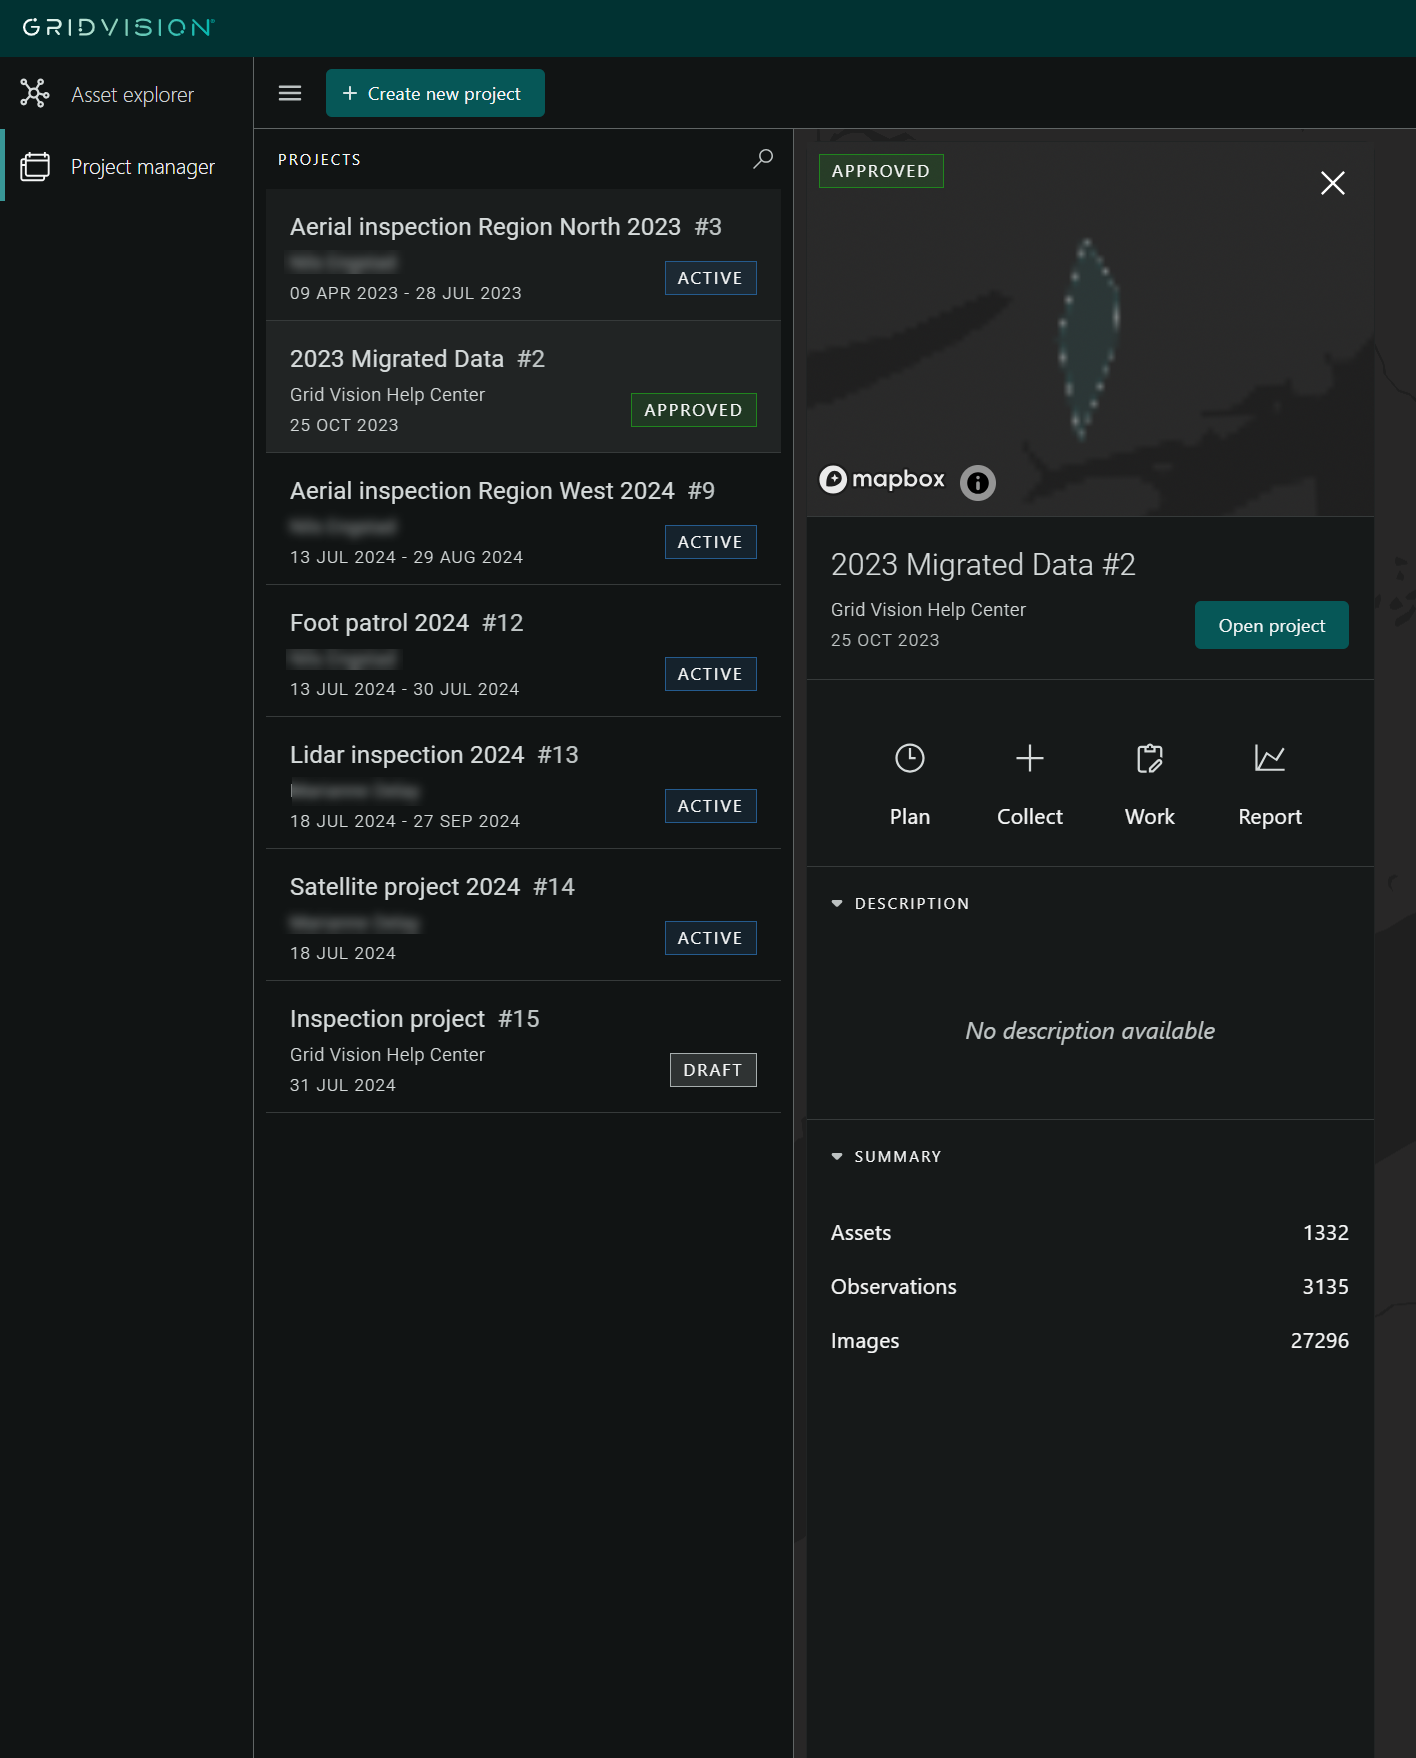
-
The compact view will automatically open, displaying:
- Project status
- A mini map
- A summary of the project (name, user, date, and "Open Project" button)
- Different modules
- Key project information
- Click the "Open Project" button within the project details pane to navigate to the Collect module.
-
Other ways to navigate to different modules include:
- Plan Module: Click the "Plan" button to access the planning module.
- Collect Module: Click the "Collect" button to access the Collect module.
- Work Module: Click the "Work" button to enter the work management module.
- Report Module: Click the "Report" button to move to the reporting module.
-
In the description section, view the project description if any details have been added.
- In the summary section, get an overview of assets, observations, and images related to the project.
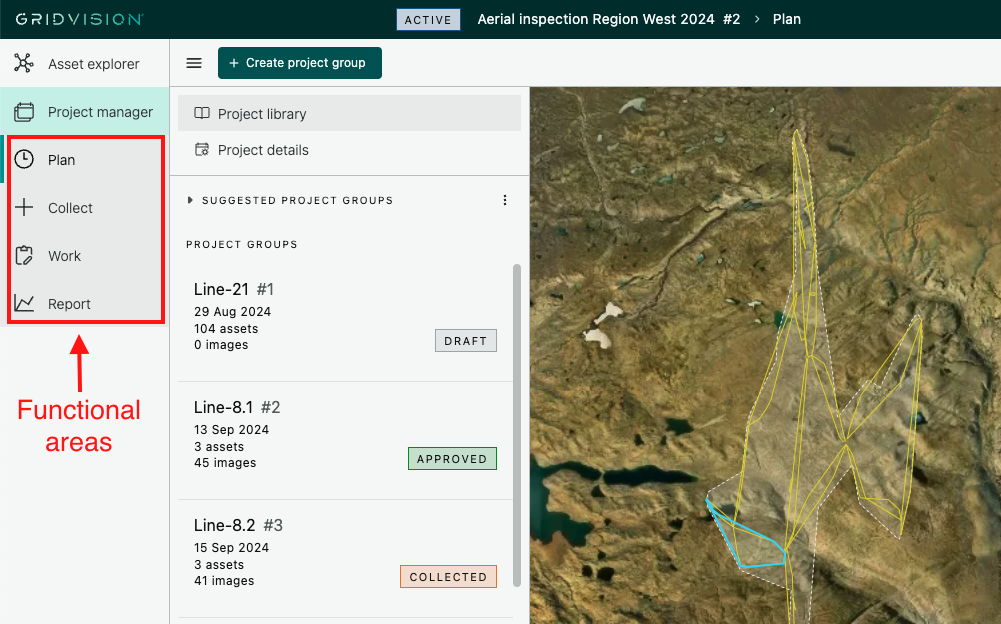
Functional areas in Grid Vision
Once a project has been created you can access four different functional areas to drive the project forward. The areas include Plan, Collect, Work and Report and are accessible via the App menu or the compact view for each project in the Project manager. Each area is described in more detailed in their separate section in the user guide.