Collect
- Deutsch: Diese Seite ist nicht ins Deutsche übersetzt
Collect Module is an essential part of the application that allows you to upload images, review and remove irrelevant ones, and verify that the images are linked to the correct assets.
Steps to collect images to the project
-
On the navigation pane, select the specific project to add data to.
-
Locate and click the Collect button in the Compact view, and confirm redirection to the Collect section.
-
In the Collect section, click the Add Data button on the module bar.
-
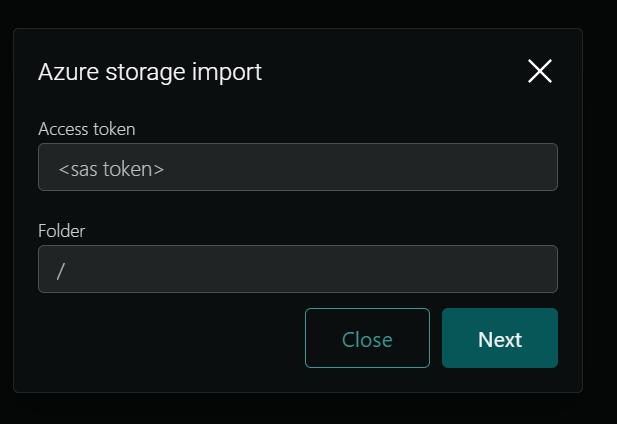
Ensure the Azure storage import pop-up appears.
-
Enter the SAS token in the Access Token field and the image folder path in the Folder field.
-
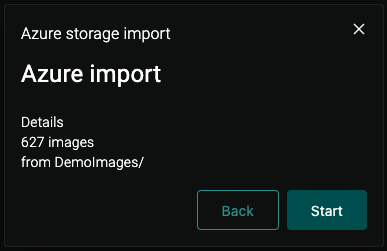
Click Next and verify that the location and details are displayed on the pop-up screen matches.
-
Click Continue to start the import process. If corrections are needed, click Back to make changes.
-
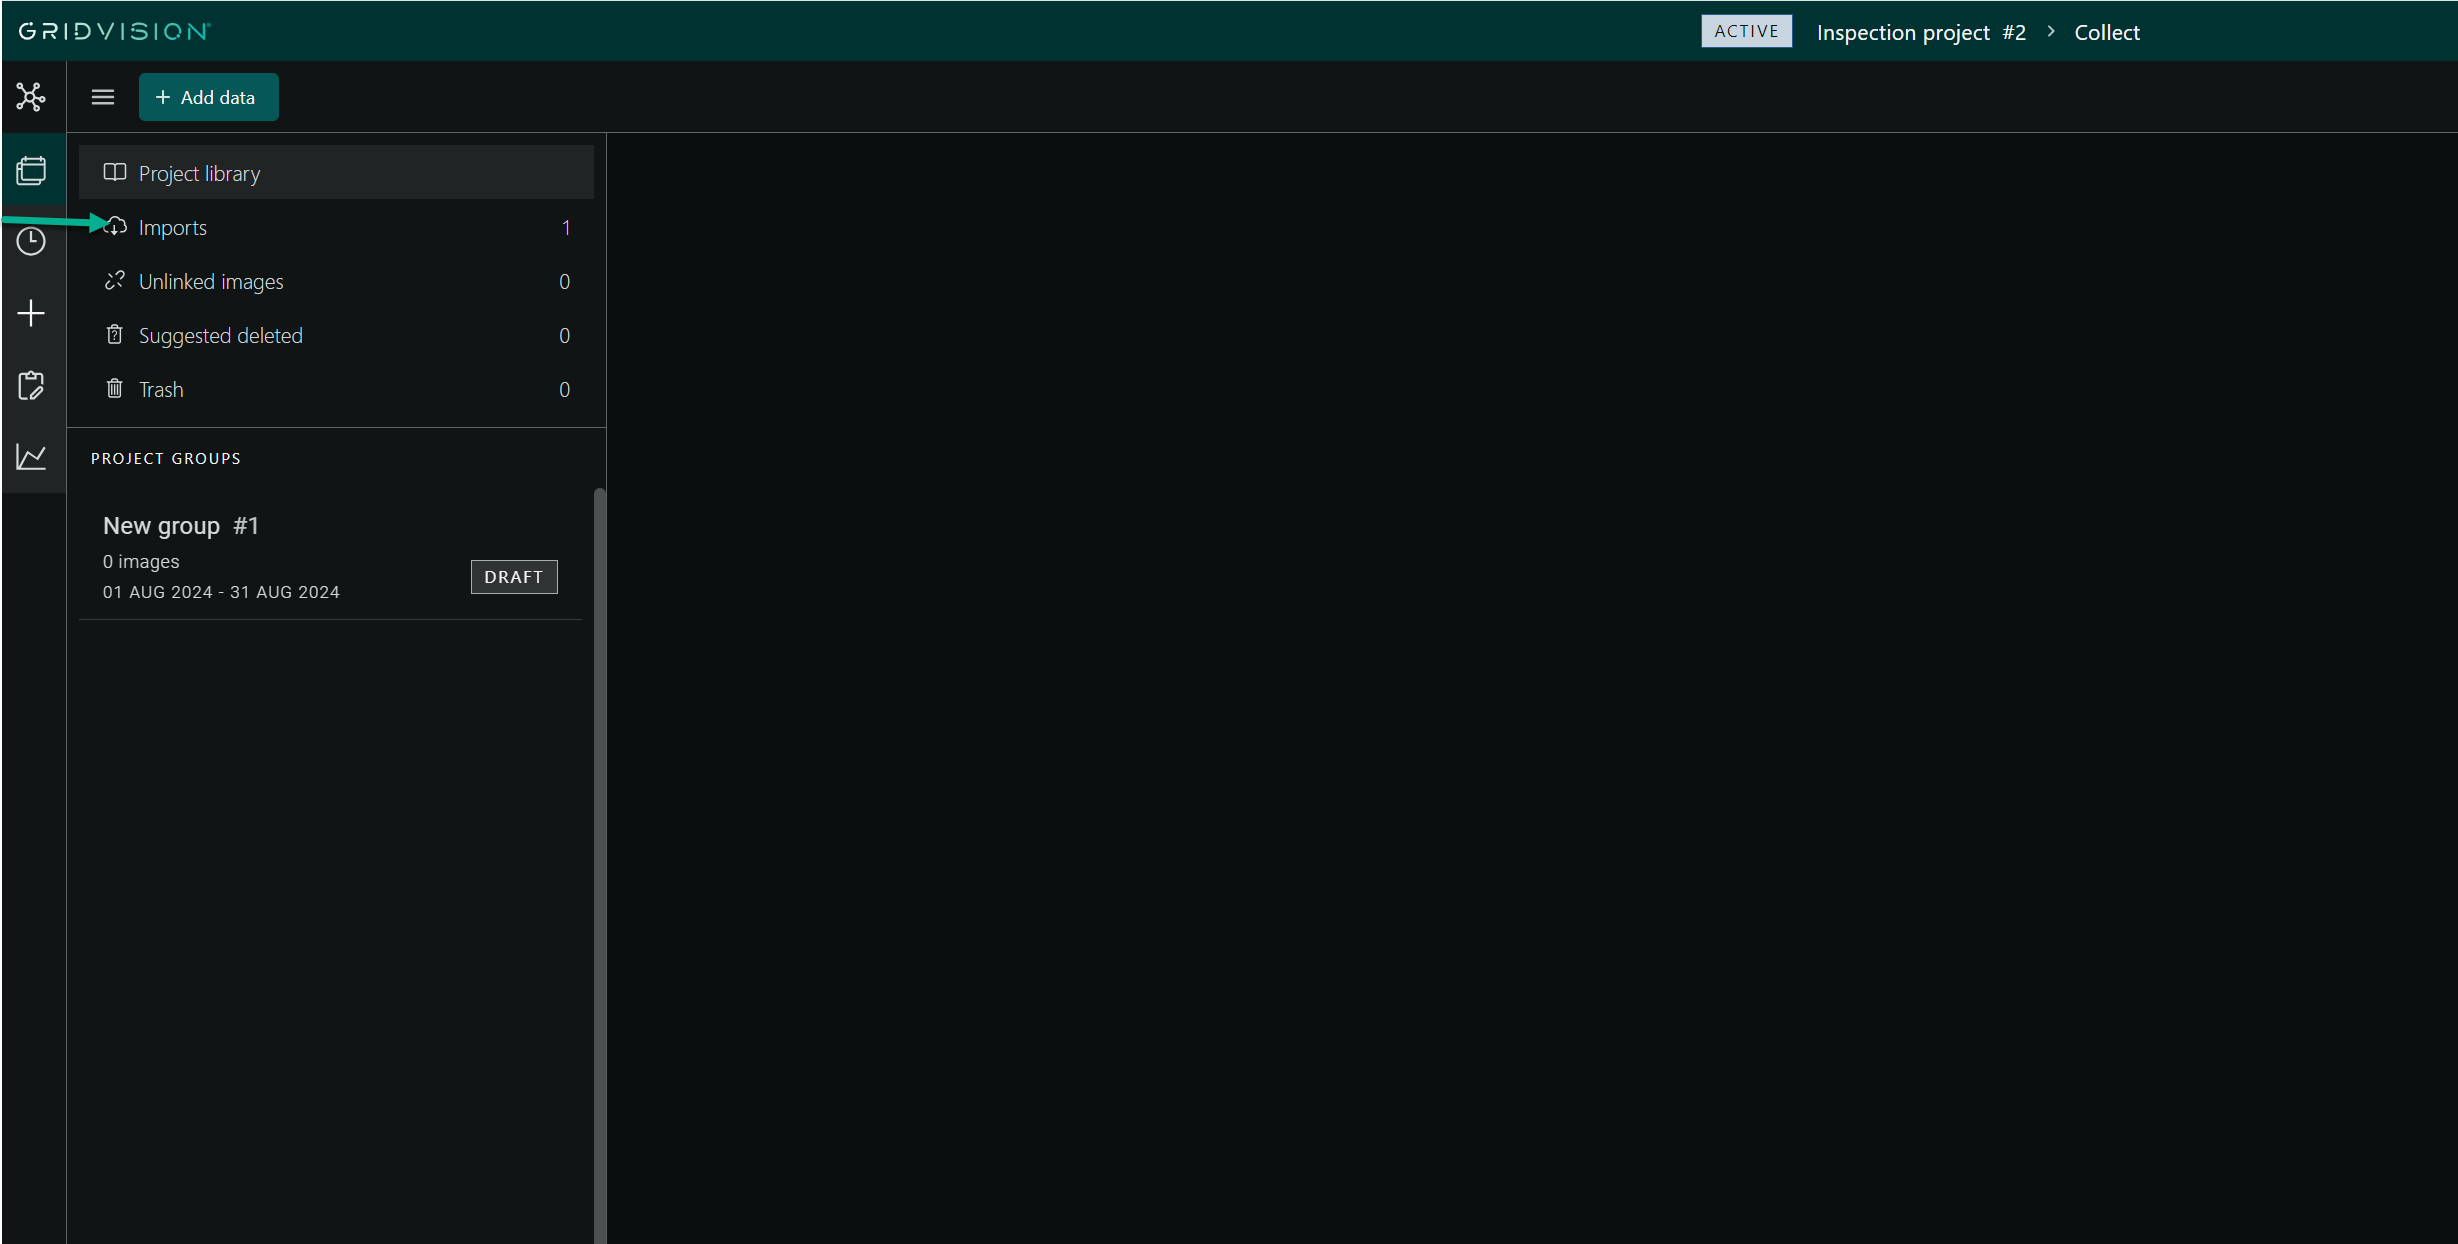
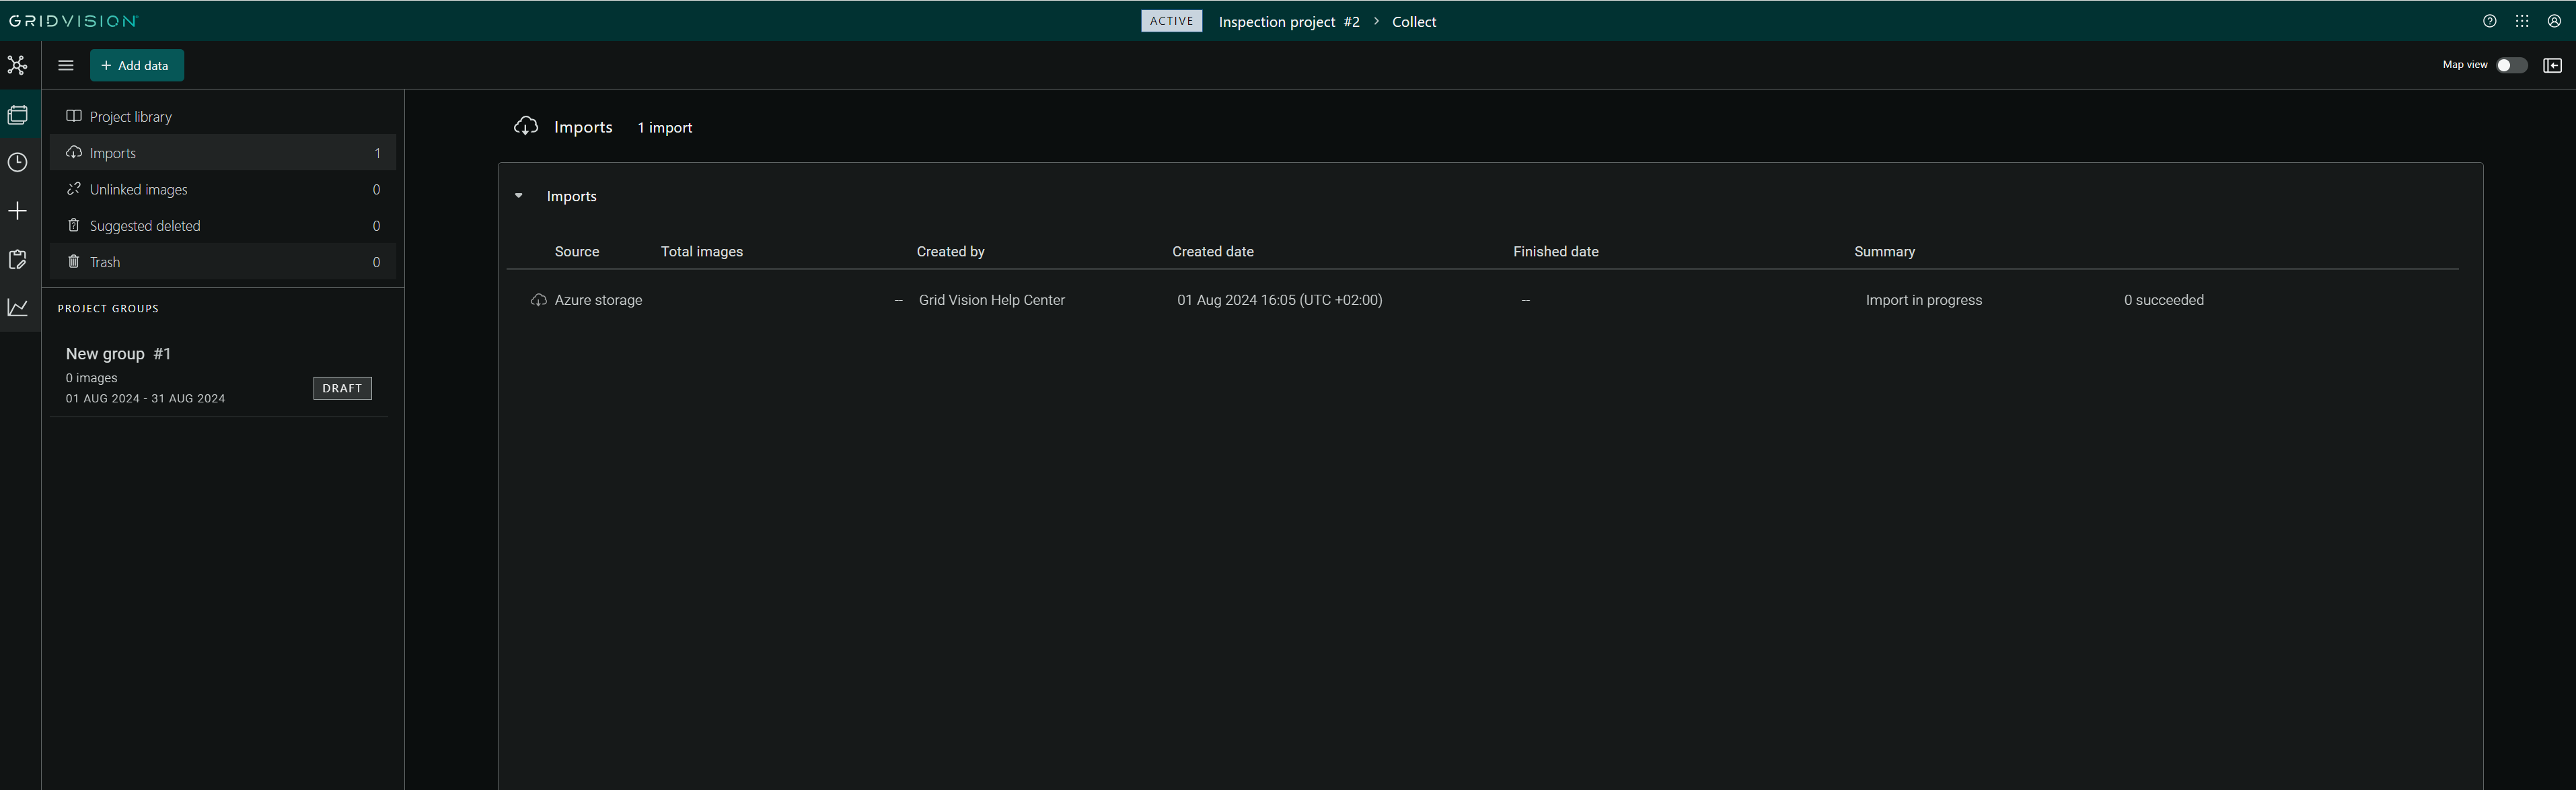
Once the import starts, it will appear in the Imports tab of the navigation pane.
-
Navigate to the Imports section to view the import details, including the number of imports, source, total images, created by, creation date, finish date, summary, and total successful imports.
-
In order to do multiple imports simultaneously follow the steps 4-8.
Steps to upload images to project - before adding assets
- Go to the Collect module immediately after creating the project.
- Click Add data, and enter the SAS URL and folder name to begin the import process.
- Once the import is finished, return to the Plan module.
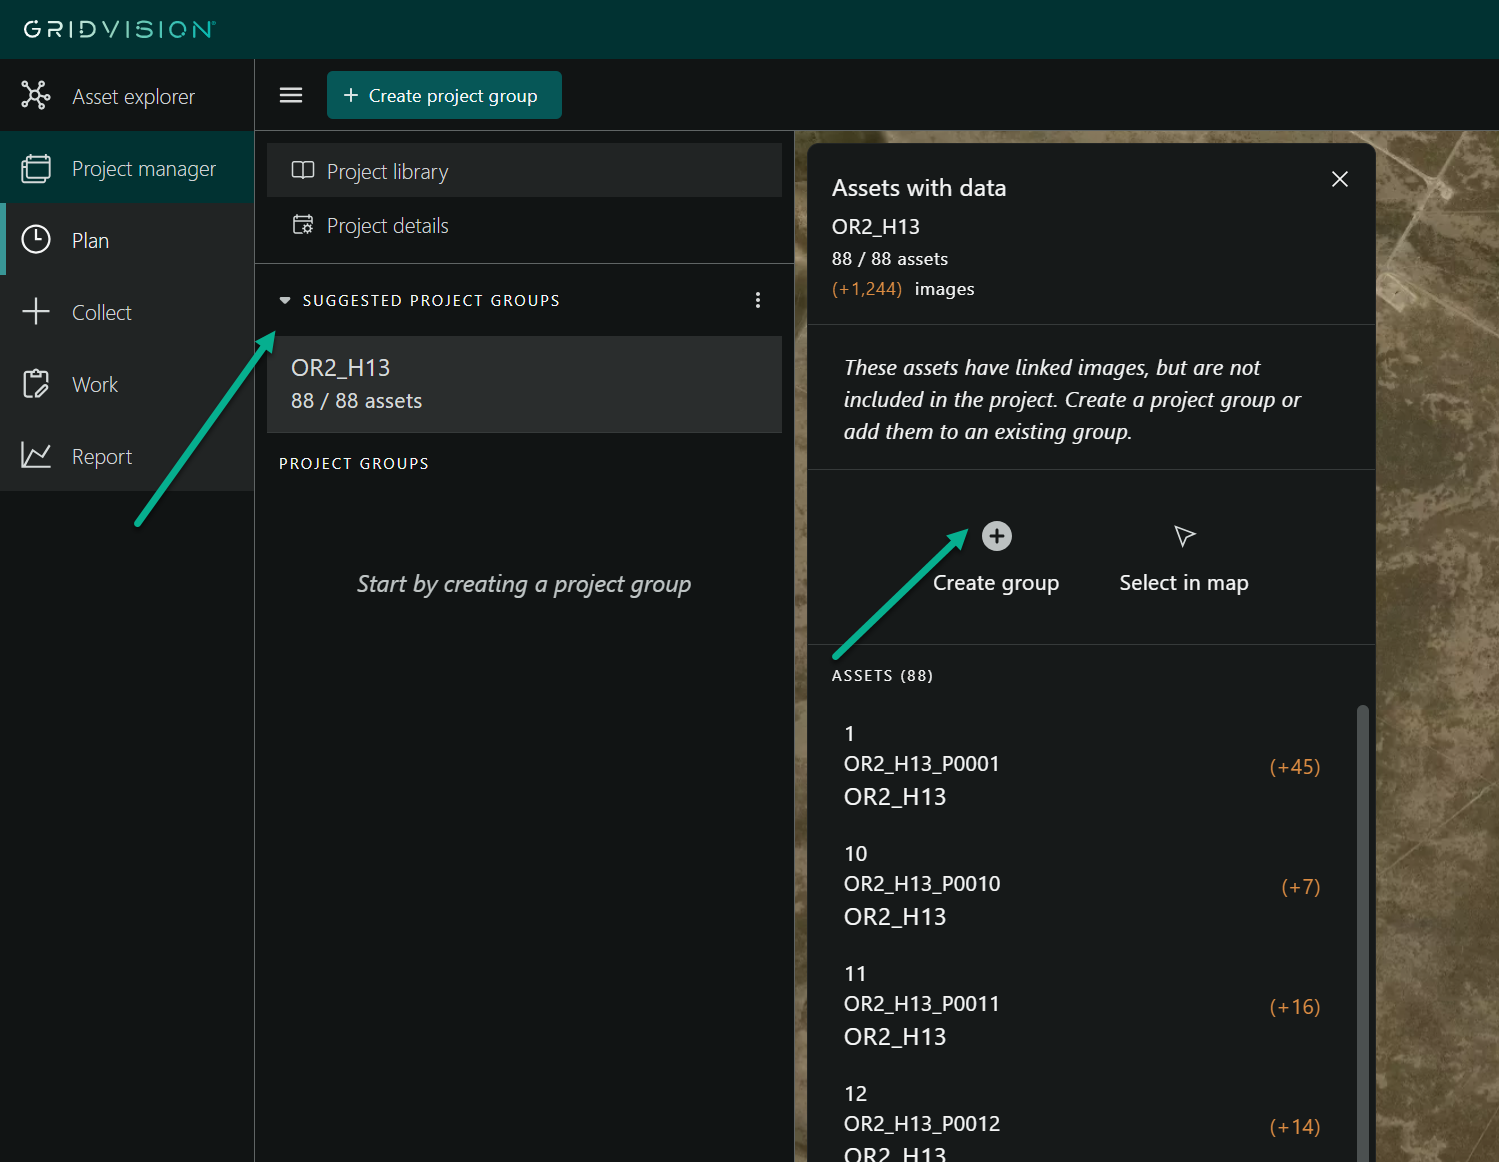
- Look for dotted polygons on the map that indicate suggested groups. These polygons highlight assets outside the project that have linked images.
- In the navigation pane, click on the "Suggested Groups", and Add the entire group directly or select specific assets to include in the group.
- If the group is not added from the suggested groups, click the "New Project Group" button to create a new group.
- Use the selection tool to choose the assets to include in the new or existing group.
- Assets with linked images will be highlighted on the map, making them easily distinguishable from grid assets.
Deleting Suggested deleted Images
- Go to the Import tab in the Collect submodule and verify that image import is complete.
- Navigate to the Suggested deleted tab to review images flagged for deletion by the AI that are not relevant for inspection.
- Select the images you want to delete. You can choose multiple images at once.
- Click the Delete button at the top of the screen to move selected images to the Trash.
- Deleted images will disappear from the Suggested Deleted tab and appear in the Trash tab.
- Review deleted images in the Trash tab. Restore any images needed before the project ends.
Image linking
-
Navigate to the Unlinked images tab within the Collect submodule.
-
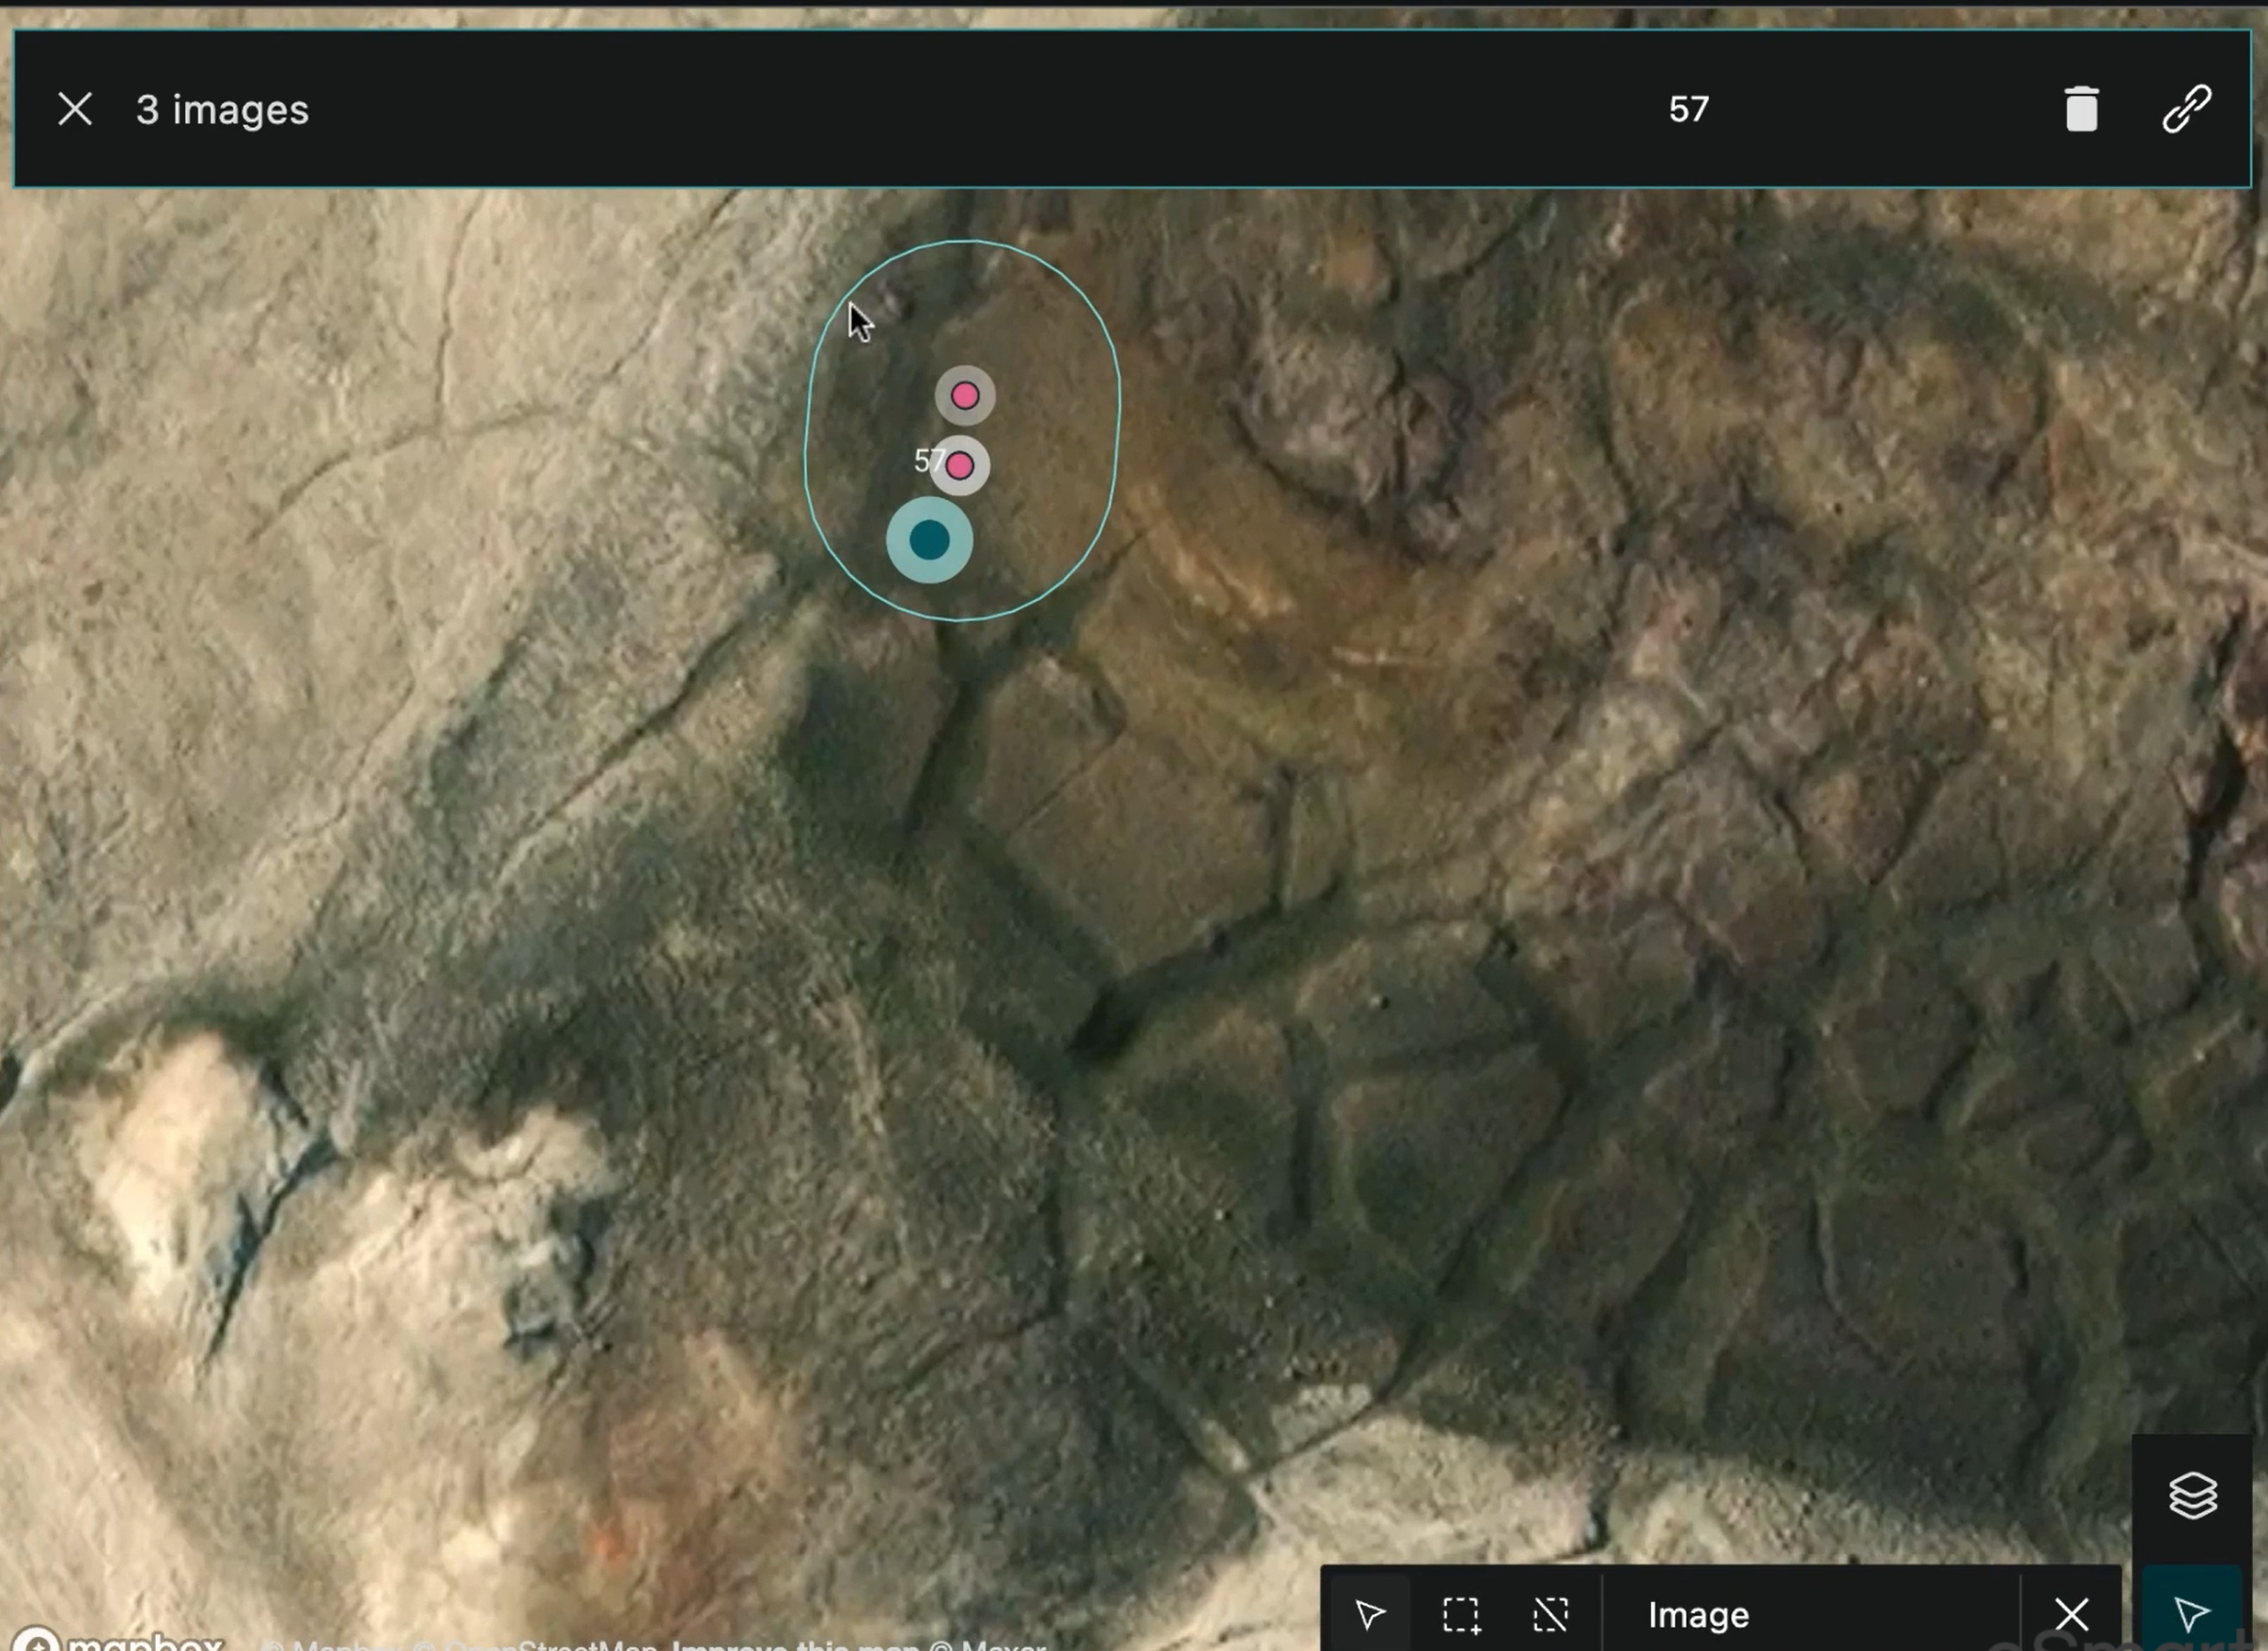
Open the gallery view to see a list of unlinked images or switch to the map view to visualize them as red clusters.

-
Zoom in on the map to locate specific assets.

-
Use the selection tool to choose multiple unlinked images by pressing Shift and dragging a box around them.

-
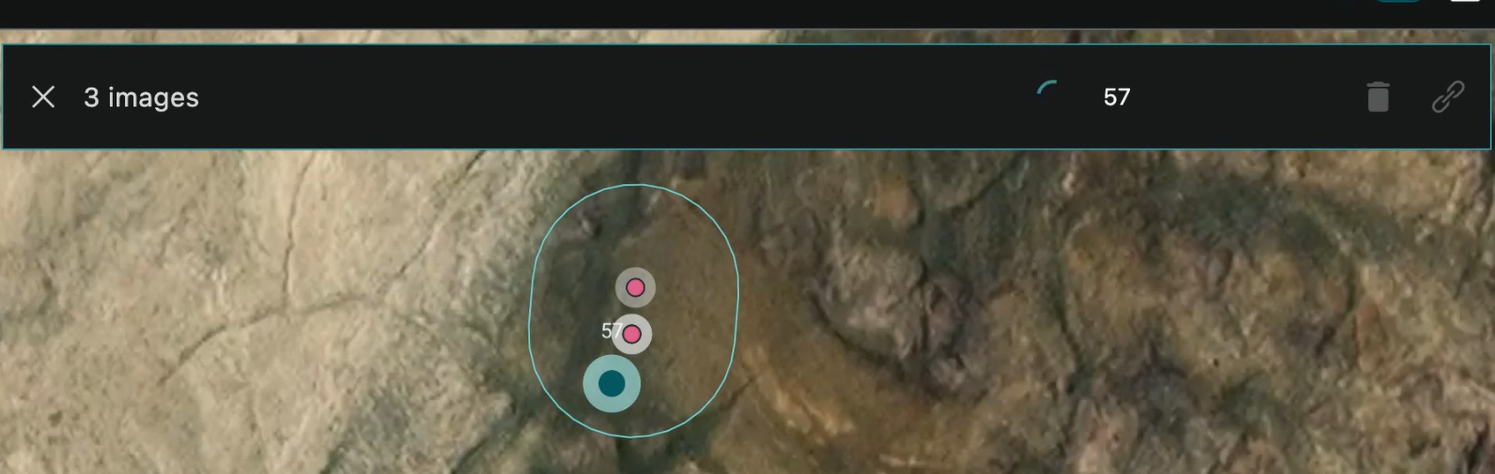
A banner will display the number of selected images and the asset ID. It is also possible to cancel the selection or delete irrelevant images from here.
-
Click the Link button to associate the selected images with the chosen asset.
-
A loading indicator will appear while linking. The Delete and Link buttons will be disabled during this process.

-
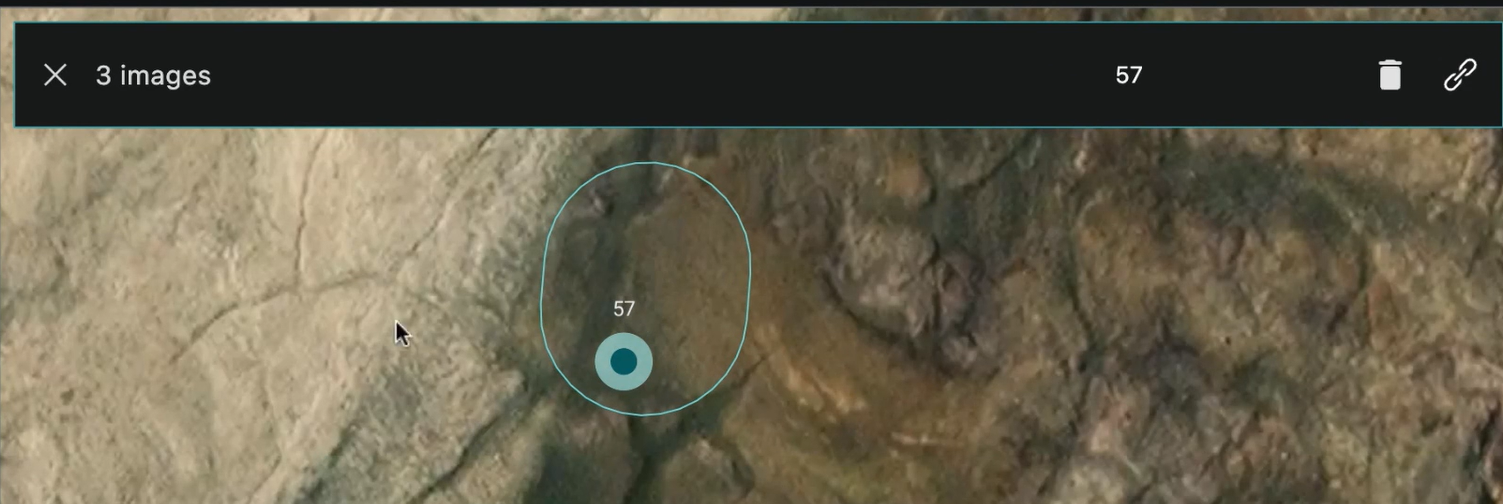
Once linking is complete, red dots representing unlinked images will disappear from the map, and the unlinked image count will decrease.
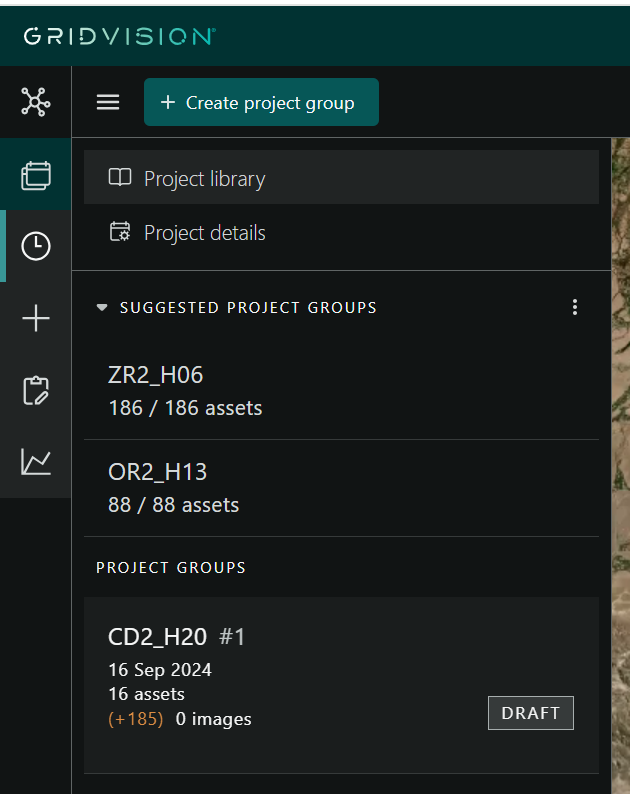
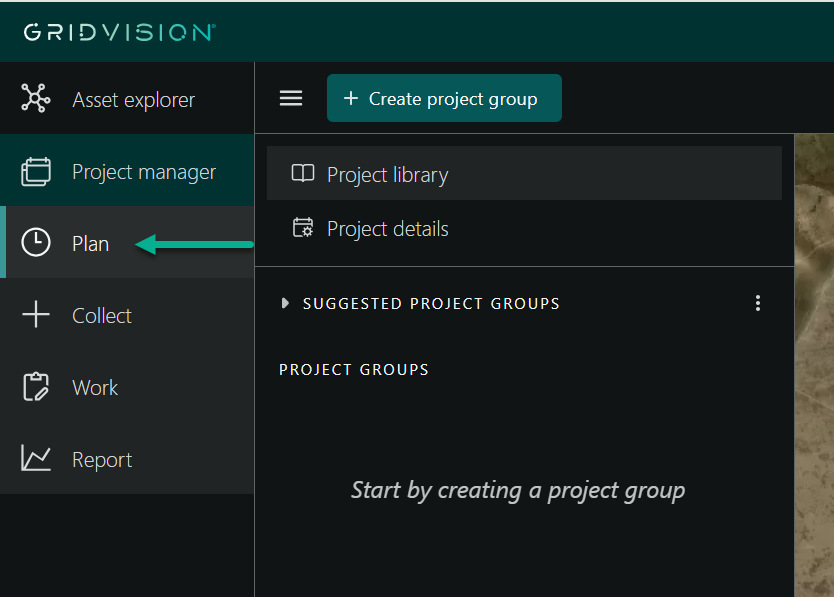
Suggested group
Suggested group is a collection of recommended assets to include in a project based on linked images not currently associated with the project.
Steps to find suggest group when in collect sub module
-
Navigate to the plane module from the collect module.
-
Find the "Suggested Project Groups" section right above the project groups.
- Expand the Suggestions and see the grouped based on grid segments.
-
New project groups can be created directly from the suggestions.
-
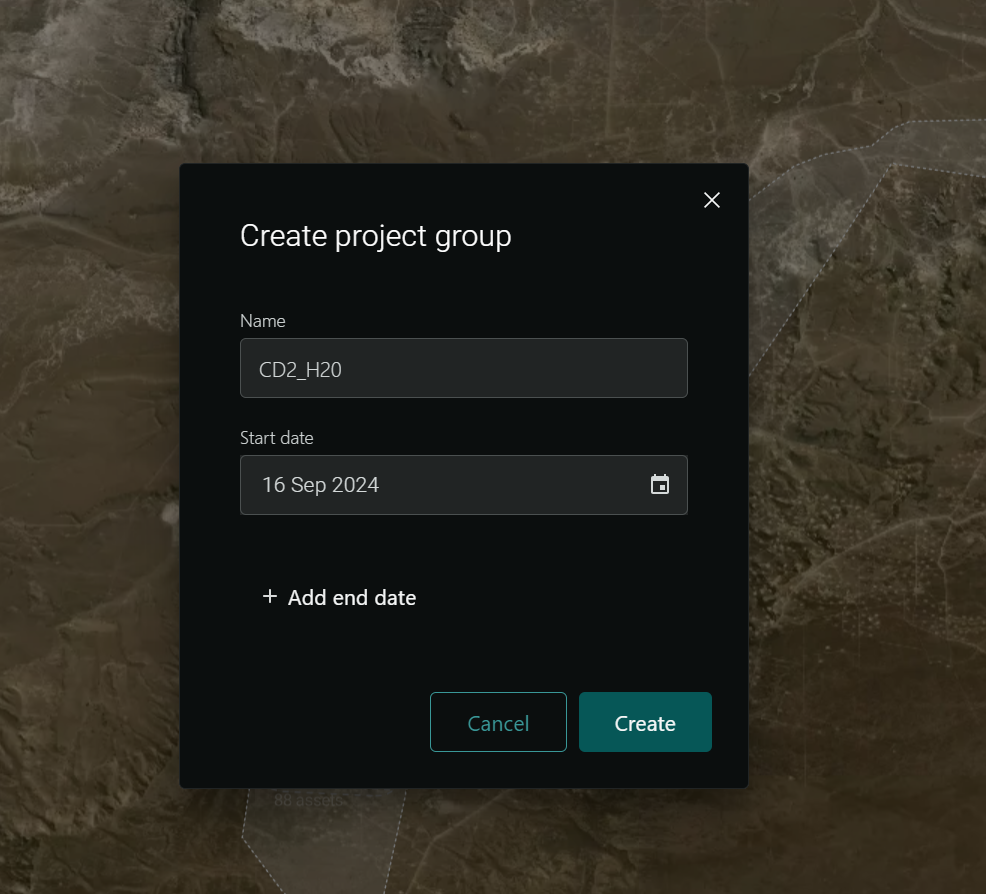
Steps to Create a Project Group from Suggested Project Groups
-
Click the "Create Group" button in the Compact view.
- A new project window will appear. Add a name for the project group (a default name is provided).
- Add the start date (default is the current date).
- Add the end date.
- Click the "Create" button.
-
The project group is created and listed under the Project Group section, and it will be removed from the Suggested Project Groups section.